A rip in your tent can turn a great outdoor trip into a stressful experience. But don’t worry—you don’t have to buy a new tent or let a tear ruin your adventure.
You can fix that rip quickly and easily, even if you’ve never done it before. In this guide, you’ll discover simple, step-by-step ways to repair your tent so it stays strong and weatherproof. Keep reading to learn how to save your gear and get back to enjoying the great outdoors without worry.

Credit: www.amazon.ca
Assessing The Damage
Checking the tear in your tent is the first step to fixing it. You need to know how big it is and what kind of rip it is.
Knowing this helps you pick the right tools and repairs. It also keeps your tent safe for your next trip.
Types Of Tent Rips
Tent rips can be different shapes and sizes. Some are small holes, and some are long tears. Each type needs a special fix.
- Small holes:Tiny punctures from sticks or rocks.
- Seam splits:The thread holding fabric parts breaks.
- Long tears:Large cuts caused by sharp objects.
- Fabric frays:Edges of the rip are worn out and loose.
Tools And Materials Needed
Having the right tools makes fixing easier and stronger. You should prepare these items before starting.
| Tool or Material | Use |
| Repair tape | Cover small holes and tears quickly |
| Seam sealer | Protect seams from water leaks |
| Strong thread | Sew ripped seams back together |
| Needle | Stitch the fabric carefully |
| Fabric patches | Reinforce large tears or holes |
| Scissors | Cut patches and tape to size |
| Rubbing alcohol | Clean the area before repair |
Preparing The Tent For Repair
Repairing a rip in your tent is a simple task if you prepare properly. It ensures the fix is durable and effective.
Preparation involves cleaning and drying the tent fabric. Let’s explore these steps further.
Cleaning The Area
Cleaning the area around the rip is crucial. Dirt or debris can prevent the patch from sticking properly.
- Remove loose dirt with a soft brush
- Use mild soap and water to clean the area
- Rinse thoroughly to remove all soap
- Inspect for any remaining debris
Drying The Fabric
Drying the fabric completely is necessary before applying any patches. Moisture can weaken the adhesive.
| Drying Method | Time Required |
| Sunlight | 1–2 hours |
| Fan | 2–3 hours |
| Hairdryer | 15–30 minutes |
Quick Fixes For Small Rips
Small rips in a tent can let in water and bugs. Fixing these quickly keeps your tent strong and dry.
Two easy ways to repair small tears are using tent repair tape and applying seam sealer. Both work well and save your tent.
Using Tent Repair Tape
Tent repair tape is sticky and made for outdoor fabric. It stops the rip from getting bigger fast.
First, clean the area around the rip. Make sure it is dry. Cut a piece of tape larger than the rip.
- Remove the backing from the tape
- Press the tape firmly over the rip
- Smooth out any bubbles or wrinkles
- Let it set for a few hours before use
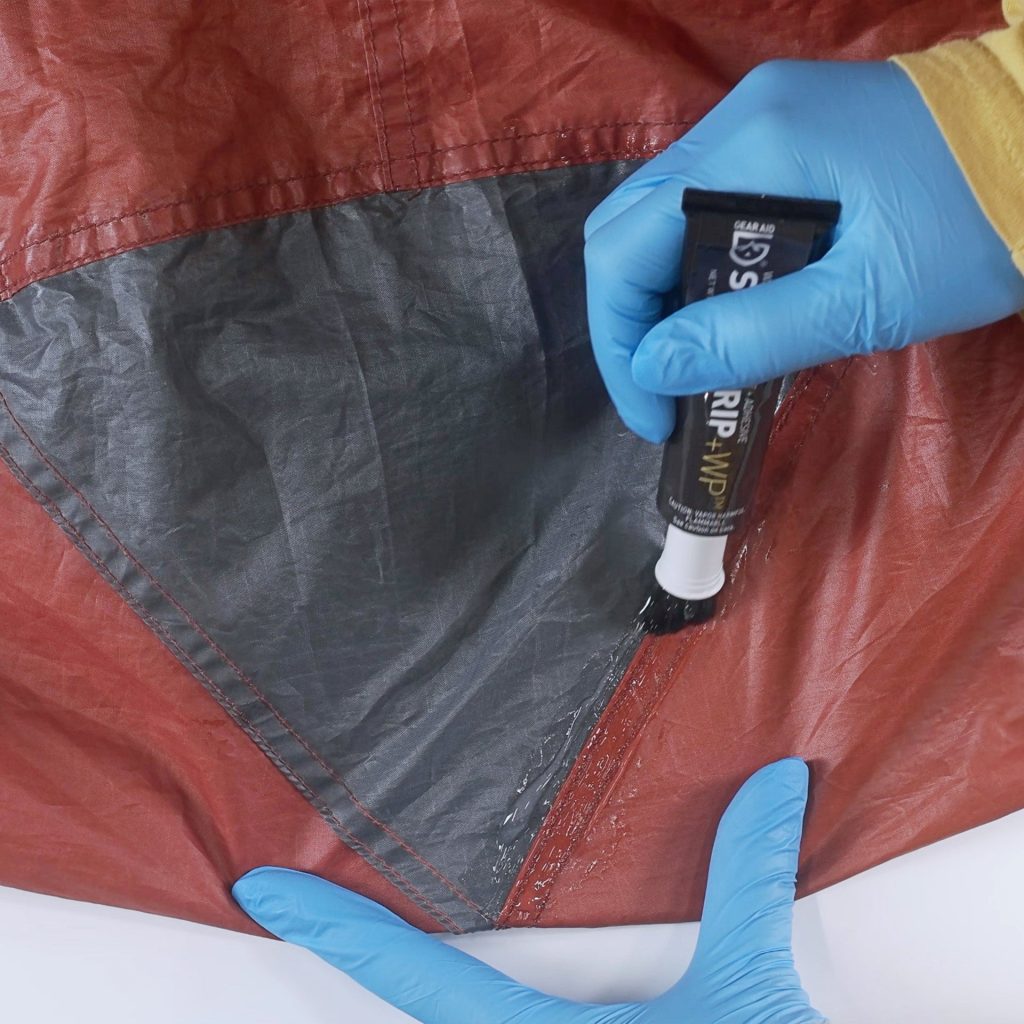
Applying Seam Sealer
Seam sealer is a liquid that seals small holes and rips. It also protects seams from water leaks.
Clean and dry the rip area. Use a small brush to apply a thin layer of seam sealer over the rip and edges.
- Cover the rip fully with sealer
- Spread it evenly for best sealing
- Let it dry completely before packing
- Apply a second coat if needed for extra strength
Fixing Larger Tears
Larger tears in your tent need strong repair to keep it safe and dry. You can fix big rips with sewing and patches.
These fixes help stop the tear from getting worse and keep the tent usable for many trips.
Sewing Techniques
Sewing is a good way to close large tears. Use strong thread that resists water and sun damage.
Use small, tight stitches to hold the fabric well. Try to sew evenly on both sides of the tear.
- Use a needle made for thick fabric
- Choose polyester or nylon thread
- Make stitches close together
- Sew from inside the tent if possible
- Tie knots tightly to secure ends
Reinforcing With Patches
Patches add extra strength to the torn area. Use tent repair patches or cut fabric from an old tent.
Place the patch on the inside or outside of the tear. Attach it with strong glue and stitching for best results.
- Clean the area before applying the patch
- Cut patch slightly larger than the tear
- Use waterproof glue made for fabric
- Sew around the patch edges for extra hold
- Let glue dry fully before using the tent
Waterproofing The Repair
Fixing a rip in your tent is only part of the job. Making sure the repair stays dry is just as important. Waterproofing keeps water out and protects the tent fabric.
This guide covers how to pick the right sealant and how to apply a waterproof coating to your repair.
Choosing The Right Sealant
Sealants help close the rip and stop water from entering. The right sealant works well with your tent fabric and lasts through weather changes.
- Silicone sealants work best on nylon and polyester tents.
- Polyurethane sealants are strong and flexible but dry slower.
- Seam sealers are made specifically for tents and fabrics.
- Avoid rubber-based sealants that can damage the fabric.
Applying Waterproof Coating
After sealing the rip, add a waterproof coating over the repair. This layer helps keep water from soaking in and protects the sealant.
| Waterproof Coating Type | Use | Drying Time |
| Silicone Spray | Quick, easy spray-on | 30 minutes |
| Fluoropolymer-based | Long-lasting water repellency | 1 hour |
| Wax-based | Good for heavy fabric | 2 hours |
Apply the coating in thin, even layers. Let each layer dry fully before adding another. Test the repair by sprinkling water to check for leaks.
Credit: medium.com
Preventing Future Damage
Fixing a rip in your tent is important. Stopping more damage helps your tent last longer.
Good habits can keep your tent safe. Use smart steps every time you camp.
Proper Tent Setup
Setting up your tent carefully stops rips and tears. Pick a flat, clean spot away from sharp rocks.
Use all stakes and poles to keep the tent tight. Loose fabric can flap and wear out fast.
- Clear the ground of sticks and stones
- Keep tent fabric off wet or rough surfaces
- Pull the tent tight but don’t overstretch
- Secure all corners and guy lines firmly
Regular Maintenance Tips
Check your tent often for small tears or dirt. Clean and dry it before storage to avoid damage.
Store your tent in a cool, dry place. Avoid folding it the same way every time to prevent weak spots.
- Inspect fabric and seams after each trip
- Use mild soap and water for cleaning
- Let the tent dry completely before packing
- Store loosely in a breathable bag
- Fix small holes early with repair tape or patches

Credit: nosopatches.com
Frequently Asked Questions
How Do I Fix A Small Rip In My Tent?
To fix a small rip, clean the area first. Use a tent repair patch or tape designed for outdoor gear. Apply it carefully on both sides of the rip for extra strength. Let it dry fully before packing the tent away.
What Materials Are Best For Tent Repair Patches?
Best materials for tent repair patches are waterproof nylon or polyester. These materials match tent fabrics and provide durability. Look for patches with strong adhesive backing. Seam sealant can add extra waterproof protection after patching.
Can I Repair A Tent Rip Without Sewing?
Yes, you can repair a tent rip without sewing using specialized tent repair tape or adhesive patches. These products are waterproof and designed for outdoor use. Ensure the surface is clean and dry before applying for the best hold.
How Long Does A Tent Rip Repair Last?
A well-done tent rip repair can last multiple camping seasons. Durability depends on patch quality, repair method, and tent usage. Always inspect and reinforce repairs before trips to maintain tent integrity.
Conclusion
Repairing a rip in your tent saves time and money. Small tears can turn into big problems quickly. Fixing them early keeps your tent strong and dry. Use simple tools and patches to make repairs easy. A well-maintained tent lasts for many camping trips.
Don’t let a rip spoil your outdoor adventure. Keep your gear ready for the next journey. Taking care of your tent shows you love the outdoors. Stay prepared, and enjoy every camping experience comfortably.