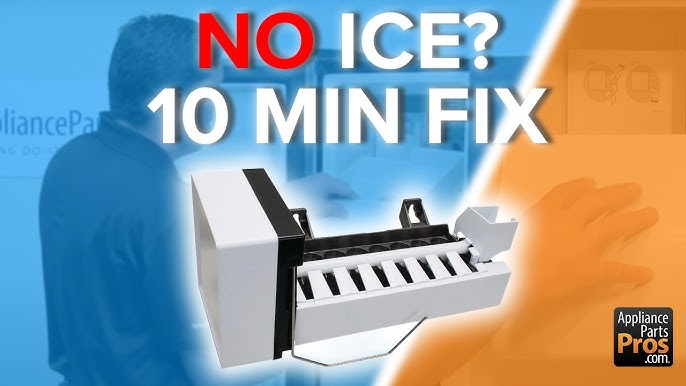
Is your Frigidaire ice maker causing more frustration than frosty cubes? You’re not alone.
Many homeowners face the inconvenience of a malfunctioning ice maker, especially when entertaining or cooling down during a hot summer day. But what if you could replace it yourself, saving time and money? Imagine the satisfaction of hearing those first cubes drop into the tray, knowing you fixed it with your own hands.
In this guide, you’ll discover simple, step-by-step instructions to replace your Frigidaire ice maker effortlessly. Don’t let a broken ice maker keep you from enjoying chilled drinks. Dive in, and let’s get your appliance back to its icy best!

Credit: www.searshomeservices.com
Signs Your Ice Maker Needs Replacement
Knowing when to replace your Frigidaire ice maker saves time and prevents bigger problems. Some signs clearly show the ice maker is failing. Spotting these early helps keep your fridge and freezer working well.
Check the ice maker often for unusual behavior. Small issues can grow fast without attention. Here are common signs that mean your ice maker might need replacement soon.
No Ice Production
The ice maker stops making ice completely. The freezer is cold but no ice appears. This may mean a broken motor or faulty water inlet valve. Sometimes, the ice maker just won’t start. This is a strong sign it needs replacing.
Ice Quality Issues
The ice cubes look cloudy or misshapen. Ice may taste bad or smell strange. Cubes can be too small or sticky. Poor quality ice often means the ice maker is dirty or parts are worn out. This reduces ice maker efficiency and calls for a replacement.
Leaks And Water Problems
Water pools around the ice maker or inside the freezer. You might see frost build-up or dripping water. Leaks can damage the freezer and food inside. Water problems often come from broken seals or cracks. Fixing leaks may require replacing the entire ice maker unit.
Tools And Materials Needed
Replacing a Frigidaire ice maker requires the right tools and materials. Having everything ready makes the job easier and safer. This section lists what you need before starting the replacement process.
Basic Tools List
- Screwdriver (Phillips and flathead)
- Socket wrench set
- Nut driver
- Needle-nose pliers
- Flashlight or work light
- Towel or small bucket for water spills
Replacement Parts
- New Frigidaire ice maker unit
- Water inlet valve (if needed)
- Mounting screws (usually come with the new unit)
- Ice maker wiring harness (if the original is damaged)
Safety Equipment
- Work gloves to protect your hands
- Safety glasses to guard your eyes
- Power tester or multimeter to check electrical connections
- Disconnect the fridge power supply before starting
Preparing For Replacement
Preparing to replace a Frigidaire ice maker is crucial for a smooth process. Proper preparation saves time and prevents damage. Begin by ensuring safety and easy access to the ice maker. Clear the surrounding area to avoid obstacles. Gather basic tools like a screwdriver and towel. Follow these steps to prepare effectively.
Turning Off Power And Water
Always cut off the refrigerator’s power to avoid electric shock. Unplug the appliance from the wall socket. Shut off the water supply connected to the ice maker. This prevents leaks and water damage during removal. Confirm both power and water are fully off before proceeding.
Accessing The Ice Maker
Open the freezer door and locate the ice maker unit. It is usually mounted on the freezer’s side wall. Remove any shelves or trays blocking access carefully. Keep screws and parts in a safe place to avoid loss. Use a flashlight for better visibility inside the freezer.
Removing Ice Bin And Components
Take out the ice bin by pulling it straight out. Empty any ice cubes into a container or trash. Remove the ice maker cover or housing by unscrewing it. Disconnect any wiring harnesses gently to avoid damage. Place all removed components on a clean surface for reassembly.
Removing The Old Ice Maker
Removing the old ice maker from your Frigidaire fridge is a key step before installing a new one. It might seem tricky at first, but with the right approach, you can do it smoothly and safely. Let’s break down the process into clear, manageable parts so you can handle it with confidence.
Disconnecting Electrical Connections
Start by unplugging the refrigerator to ensure safety. Then, locate the electrical connector attached to the ice maker. It usually clips in place, so gently press the tab to release it without pulling on the wires.
Never yank the wires directly; this can cause damage that might require professional repair. If you notice any corrosion or buildup, clean it carefully with a dry cloth before disconnecting.
Detaching Mounting Screws
Next, find the screws securing the ice maker to the freezer wall. These are often Phillips-head screws, so keep a screwdriver handy. Remove each screw slowly and place them somewhere safe—you’ll need them if you decide to reinstall or keep the old unit.
Pay attention to how the ice maker is positioned as you remove the screws. This will help you understand how the new unit fits and attaches.
Careful Removal Tips
Once the electrical connections and screws are free, you can gently pull the ice maker away from the freezer wall. If it feels stuck, don’t force it; check for any hidden clips or wires you might have missed.
Keep a towel nearby to catch any melting ice or water that could drip during removal. Have you ever struggled with a part that just wouldn’t budge? Taking a moment to inspect closely often saves time and frustration.
Installing The New Ice Maker
Installing the new ice maker is a crucial step that requires careful attention to detail. Proper installation ensures your Frigidaire ice maker functions smoothly and efficiently. Let’s walk through the essential tasks to get your new unit up and running.
Positioning The Unit
Start by carefully sliding the new ice maker into the designated space inside your freezer. Make sure it aligns perfectly with the mounting bracket and electrical connections. Double-check that the unit sits flat and is not tilted, which can affect ice production.
Have you noticed how a small misalignment can cause bigger issues down the line? Taking a moment to position the unit correctly saves you from redoing the work later.
Securing Mounting Screws
Once the ice maker is correctly positioned, grab your screwdriver and secure the mounting screws. Tighten each screw firmly but avoid over-tightening, which could crack the plastic housing. Properly secured screws keep the ice maker stable and prevent vibrations that might cause noise or damage.
Think about how a loose fixture can rattle every time the ice maker cycles—tightening those screws will keep your fridge quiet and efficient.
Reconnecting Electrical And Water Lines
Next, reconnect the electrical plug to restore power to the ice maker. Make sure the connection clicks into place to ensure a secure fit. Then, attach the water line carefully, checking for any kinks or leaks that could disrupt water flow.
Have you ever experienced water leaks that flood the freezer? Inspecting the water line connection closely helps avoid that frustrating problem. After reconnecting, test the ice maker by running a cycle to confirm everything works perfectly.

Credit: www.dtappliance.com
Testing The New Ice Maker
After installing your new Frigidaire ice maker, the real test begins. Ensuring everything works properly means checking power, water flow, and the ice-making cycle itself. Skipping these checks could mean dealing with leaks or a non-functioning ice maker later.
Restoring Power And Water
First, reconnect the power supply to your refrigerator. Make sure the outlet is working by testing other devices if needed. Next, turn the water valve back on slowly to avoid sudden pressure spikes that might cause leaks.
You might hear water flowing inside, which is a good sign. But have you checked your water line for any kinks or blockages before restoring flow? This simple step can prevent many issues.
Running Initial Ice Cycle
Once power and water are back, your ice maker needs to run an initial cycle to prime itself. This usually takes a few hours, so be patient. During this time, the ice maker fills the mold and freezes water into ice cubes.
Don’t expect ice immediately; the first batch may be small or uneven. Have you noticed your ice maker making unusual noises? It’s worth listening closely, as odd sounds can signal installation problems.
Checking For Leaks And Operation
After the initial cycle, inspect the area around your ice maker carefully. Look for water puddles or damp spots under the refrigerator and near the water line connection. Even a slow drip can cause damage over time.
Also, watch how the ice maker ejects the cubes. Are they being pushed out smoothly? If cubes stick or the mechanism jams, double-check the installation steps. Your ice maker should produce consistent, clear ice cubes without interruption.
Troubleshooting Common Issues
Troubleshooting common issues helps fix your Frigidaire ice maker quickly. Problems can stop ice production or cause leaks. Identifying the cause saves time and effort. Follow simple checks before calling a technician.
No Ice Production After Installation
Check if the ice maker is turned on. Make sure the water supply valve is open. Inspect the water line for kinks or blockages. Confirm the freezer temperature is set below 10°F (-12°C). Reset the ice maker by unplugging the fridge for a few minutes. Allow 24 hours for ice production to start after installation.
Water Leakage Problems
Look for loose or disconnected water lines. Tighten all fittings to stop leaks. Check the water inlet valve for cracks or damage. Inspect the drain hole and drip tray for clogs. Clear any ice buildup around the water dispenser. Place a towel under the ice maker to catch drips during testing.
Ice Maker Not Cycling Properly
Test the ice maker’s motor and ejector arm for smooth movement. Remove any ice jams blocking the cycle. Clean the sensor arm to ensure it moves freely. Verify the control module is functioning with no error lights. Replace faulty parts like the thermostat or motor if needed. Cycle the ice maker manually to observe operation.

Credit: www.youtube.com
Maintenance Tips For Longevity
Keeping your Frigidaire ice maker in top shape doesn’t just save you from frequent repairs; it ensures you always have clean, fresh ice ready. Small, consistent actions can prevent bigger headaches down the road. Are you ready to give your ice maker the care it deserves?
Regular Cleaning
Cleaning your ice maker regularly stops dirt and mineral buildup that can clog the system. Wipe down the interior with a mixture of warm water and mild detergent every few weeks. Don’t forget to clean the ice bin and the ice mold—this keeps your ice tasting fresh and your machine running smoothly.
One time, I skipped cleaning for months and noticed ice cubes sticking together. After a thorough cleaning, the machine worked like new again. It’s a simple fix that can save you from replacing parts prematurely.
Inspecting Water Lines
Check the water lines feeding your ice maker for leaks or kinks at least once a month. Even a small leak can reduce ice production or cause water damage. Make sure the hose is securely connected and free from cracks.
If you spot any damage, replace the line immediately. Ignoring this can lead to bigger issues, like mold growth or electrical problems. What would happen if water flow to your ice maker suddenly stopped?
Replacing Filters
Filters keep impurities out of your ice and protect internal components. Change the water filter every six months or as recommended in your Frigidaire manual. If your ice tastes odd or the machine slows down, it might be time for a new filter.
Think about how often you use your ice maker—high usage might mean you need to replace filters more frequently. Keeping filters fresh ensures the best ice quality and extends the life of your appliance.
Frequently Asked Questions
How Do I Know If My Frigidaire Ice Maker Needs Replacement?
If your ice maker stops producing ice or makes unusual noises, it may need replacement. Check for leaks or ice jams as well. Consistent issues despite troubleshooting indicate replacement is necessary.
What Tools Are Required To Replace A Frigidaire Ice Maker?
You will need a screwdriver, pliers, a socket wrench, and possibly a nut driver. Always unplug the refrigerator before starting the replacement process to ensure safety.
How Long Does It Take To Replace A Frigidaire Ice Maker?
Replacing a Frigidaire ice maker typically takes 30 to 60 minutes. Time may vary depending on your experience and model complexity.
Can I Replace The Ice Maker Myself Or Need A Professional?
Many homeowners can replace the ice maker themselves with basic tools and instructions. However, if unsure, hiring a professional ensures correct installation and avoids damage.
Conclusion
Replacing your Frigidaire ice maker can save time and money. Follow each step carefully for best results. Double-check all connections to avoid leaks or errors. Take your time and stay patient throughout the process. Soon, your ice maker will work like new again.
Enjoy fresh ice without calling a repair service. Simple fixes often bring the best satisfaction. Keep this guide handy for future repairs. You’ve got this!