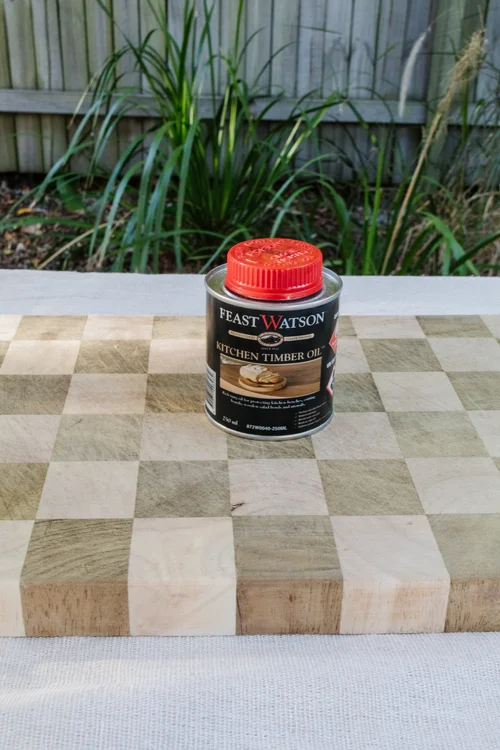
Is your cutting board looking worn, scratched, or stained? You might think it’s time to toss it out, but what if you could bring it back to life with just a few simple steps?
Restoring your cutting board not only saves you money but also keeps your kitchen safe and clean. You’ll discover easy and effective ways to refresh your cutting board so it looks and feels like new. Keep reading, and you’ll be amazed at how simple it is to give your trusty kitchen tool a fresh start.
Signs Your Cutting Board Needs Restoration
Cutting boards can wear out with time and use. Knowing when to restore your board helps keep it safe and clean.
Restoring your cutting board makes it last longer and keeps it looking good.
Visible Cracks And Splits
Cracks and splits appear on your cutting board after heavy use. These can trap food and bacteria.
Small cracks can grow bigger and damage the board more. Fixing them early helps maintain the board’s strength.
Stubborn Stains And Odors
Stains from foods like beets or berries can stay on the board. These marks make the board look old and dirty.
Strong smells from garlic, onions, or fish can stay in the wood. This can affect the taste of other foods.
Rough And Worn Surface
When your cutting board feels rough or splintered, it needs attention. A rough surface can hurt your knives and hands.
A worn surface shows the wood is dry and needs oiling or sanding to become smooth again.
Gathering Essential Tools And Materials
Restoring a cutting board needs the right tools and materials. This helps bring back its smooth surface and keep it safe for food.
Knowing what to gather first makes the restoration easier and faster. Below are the key items you will need.
Sanding Supplies
Sanding removes scratches and old stains from the cutting board. It smooths the surface so the wood looks fresh again.
You need different sandpaper grits for the job. Start with coarse grit and finish with fine grit for the best results.
- Coarse grit sandpaper (60-80 grit)
- Medium grit sandpaper (120-150 grit)
- Fine grit sandpaper (220 grit or higher)
- Sanding block or electric sander
- Clean cloth to wipe dust
Cleaning Agents
Cleaning the board before and after sanding is important. It removes dirt, oils, and bacteria from the wood.
Use gentle cleaners that do not damage the wood. Avoid harsh chemicals that can soak into the cutting board.
- Mild dish soap
- Warm water
- White vinegar for light disinfecting
- Baking soda for odor removal
- Soft brush or sponge
Oils And Conditioners
Oils and conditioners protect the cutting board after sanding. They keep the wood from drying out and cracking.
Choose food-safe products made for wooden kitchen tools. Apply them regularly to keep the board in good shape.
- Food-grade mineral oil
- Beeswax-based wood conditioner
- Cutting board oil blends
- Clean cloth or brush for application
Cleaning And Sanitizing The Board
Keeping your cutting board clean is important for safe food preparation. Proper cleaning removes dirt and food bits.
Sanitizing kills bacteria and stops smells from building up. This helps keep your kitchen healthy.
Removing Food Residue
Start by scraping off leftover food with a plastic scraper or spatula. Avoid metal tools that can damage the board.
Wash the board with warm water and dish soap. Use a sponge or brush to scrub the surface well.
- Use warm, soapy water
- Scrub all sides of the board
- Rinse thoroughly with clean water
- Dry with a clean towel or air dry
Eliminating Bacteria And Odors
To kill bacteria, use a natural sanitizer like white vinegar or diluted bleach. These are safe and effective.
Lemon juice and coarse salt help remove smells. Rub them on the board, then rinse and dry.
- Spray or wipe white vinegar on the board
- Let it sit for a few minutes
- Rinse with water and dry
- For odors, sprinkle salt and rub lemon juice
- Rinse again and air dry
Sanding Techniques For A Smooth Surface
Sanding a cutting board brings back its smooth and clean surface. It removes scratches, stains, and rough spots.
Using the right sanding methods helps protect the wood and makes the board safe to use again.
Choosing The Right Grit
Sandpaper grit affects how smooth the board will be. Coarse grit removes deep marks. Fine grit smooths the surface.
- Start with 80 or 100 grit for heavy sanding.
- Use 150 grit to remove smaller scratches.
- Finish with 220 or higher grit for a smooth finish.
- Avoid skipping grits to keep an even surface.
Step-by-step Sanding Process
Follow these steps to sand your cutting board properly and safely.
- Clean the board to remove dirt and food.
- Start sanding with coarse grit paper in the direction of the wood grain.
- Change to medium grit paper and sand the entire surface again.
- Use fine grit paper for the last sanding pass.
- Wipe off dust with a damp cloth after sanding.
- Let the board dry completely before use or oiling.
Applying Oil For Protection And Shine
Oiling a cutting board helps protect it from damage. It also gives the board a nice shine.
Using the right oil and applying it well keeps your board safe and looking good.
Selecting Food-safe Oils
Choose oils that are safe to use with food. These oils do not spoil easily and do not harm health.
Some oils soak well into wood and keep it from drying out.
- Mineral oil is popular and safe for cutting boards.
- Food-grade coconut oil is natural and resists spoiling.
- Walnut oil is good but may cause allergies for some.
- Beeswax mixed with oil can add extra protection.
Proper Application Methods
Clean your board well before applying oil. Dry it completely for best results.
Use a soft cloth or paper towel to spread the oil evenly.
- Pour a small amount of oil onto the board.
- Rub the oil in circular motions to cover the surface.
- Apply oil to all sides and edges of the board.
- Let the oil soak in for several hours or overnight.
- Wipe off any extra oil with a clean cloth.
- Repeat oiling regularly to keep the board protected.

Credit: homewithgraceandjoy.com
Maintaining Your Restored Cutting Board
Keeping your cutting board in good shape helps it last longer. Proper care stops damage and keeps the surface safe for food.
After restoring your cutting board, follow easy steps to maintain it. Cleaning and oiling are the key tasks to do regularly.
Routine Cleaning Tips
Clean your cutting board after every use. Avoid soaking it in water to prevent warping or cracking.
- Wash with warm, soapy water using a soft sponge.
- Rinse well and dry with a clean towel right away.
- Sprinkle coarse salt and rub with a lemon to remove odors and stains.
- Never put your wooden board in the dishwasher.
- Allow the board to air dry fully before storing it.
Regular Oiling Schedule
Oiling your cutting board keeps the wood hydrated and prevents cracks. Use food-safe mineral oil or beeswax oil.
| Frequency | Action |
| Weekly | Apply a thin coat of oil after cleaning and drying the board. |
| Monthly | Rub beeswax or a conditioning oil for extra protection. |
| When Dry | Oil immediately if the wood looks dry or feels rough. |
Avoiding Common Mistakes
Restoring a cutting board can extend its life and keep it safe for food. Many people make simple mistakes that damage the board further. Learning what to avoid helps you keep your cutting board in top shape.
This guide covers two common mistakes: exposing your board to too much water and using harmful chemicals. Avoiding these will help your cutting board last longer and stay clean.
Overexposure To Water
Too much water can cause wood cutting boards to crack and warp. Avoid soaking your board or leaving it wet for a long time. Dry your board quickly after cleaning to keep it safe.
- Do not soak the board in water
- Wash with a damp cloth or mild soap
- Dry immediately with a clean towel
- Store in a dry, upright position
- Use mineral oil to seal and protect the wood
Using Harmful Chemicals
Harsh chemicals can damage the wood and leave harmful residue. Avoid bleach or strong detergents. Use natural cleaners that are safe for wood and food contact surfaces.
| Chemical Type | Effect on Cutting Board | Safe Alternative |
|---|---|---|
| Bleach | Breaks down wood fibers and leaves residue | Mild soap and water |
| Strong detergents | Dries out the wood and dulls finish | Vinegar diluted with water |
| Oven cleaners | Harsh chemicals that damage wood surface | Use baking soda paste for stains |

Credit: homewithgraceandjoy.com

Credit: www.slightlycrookedworkshop.com
Frequently Asked Questions
How Do I Clean A Cutting Board?
To clean a cutting board, use hot soapy water and a scrub brush. Rinse thoroughly and dry with a clean towel. For deeper cleaning, sprinkle salt and scrub with a lemon. This helps remove stains and odors effectively.
Can I Use Vinegar To Sanitize My Cutting Board?
Yes, vinegar is a natural disinfectant. Apply white vinegar to the cutting board and let it sit for a few minutes. Rinse with hot water and dry thoroughly. This method effectively kills bacteria and deodorizes the board.
How Often Should I Oil My Cutting Board?
Oil your cutting board every three to four weeks. Use food-grade mineral oil for best results. Apply generously and let it soak in overnight. This helps maintain the board’s condition and prevents it from drying out and cracking.
What Should I Avoid Using On Cutting Boards?
Avoid using harsh chemicals and abrasive scrubbers. These can damage the board’s surface. Also, do not soak the board in water for long periods. This can cause warping and splitting.
Conclusion
Restoring a cutting board takes just a few simple steps. Clean it well, sand rough spots, and apply oil. This helps keep the board strong and safe to use. Regular care makes your cutting board last longer. Save money and reduce waste by fixing it yourself.
Enjoy a fresh, smooth surface for all your cooking needs. Try these tips to keep your kitchen tools in great shape. Small efforts bring big results. Your cutting board will thank you.