Are you tired of your engine sputtering and stalling at the worst possible moments? Do you long for the smooth, purring performance that only a perfectly tuned carburetor can provide?
You’re not alone. Many enthusiasts share the same frustration, but the solution is simpler than you might think. Tuning your carburetor with a vacuum gauge is a game-changer. It’s a precise, efficient way to ensure your engine runs at its best.
Imagine cruising down the road with confidence, knowing your engine is optimized for performance and efficiency. In this guide, you’ll discover the step-by-step process to master this skill. By the end, you’ll have the knowledge and confidence to transform your vehicle’s performance, making those unreliable starts and rough idles a thing of the past. Curious to learn how? Keep reading to unlock the secrets of carburetor tuning with a vacuum gauge. Your engine deserves it!
Carburetor Basics
Understanding the basics of a carburetor is essential before you start tuning it with a vacuum gauge. The carburetor plays a key role in mixing air and fuel to keep your engine running smoothly. Knowing how it works and how vacuum affects its performance will help you make precise adjustments.
Purpose Of A Carburetor
A carburetor mixes air and fuel in the right ratio for combustion inside your engine. It controls how much air enters the engine and sprays fuel accordingly. This balance is crucial because too much fuel wastes gas, and too little causes poor engine performance.
Think about your last engine tune-up. If your carburetor wasn’t adjusted right, you might have noticed rough idling or hesitation. This happens because the air-fuel mix was off, showing why the carburetor’s role matters so much.
Role Of Vacuum In Engine Performance
Vacuum inside the engine acts like a signal showing how efficiently the carburetor is working. When the engine sucks air in, it creates a vacuum that helps pull fuel through the carburetor jets. Measuring this vacuum gives you clues about the engine’s health and carburetor settings.
If you’ve ever used a vacuum gauge, you know that steady readings usually mean the engine is running well. Fluctuating or low vacuum levels could point to leaks, wrong fuel mixture, or timing issues. Watching these vacuum changes closely lets you tune the carburetor for better power and fuel efficiency.

Credit: www.vevor.ca
Vacuum Gauge Essentials
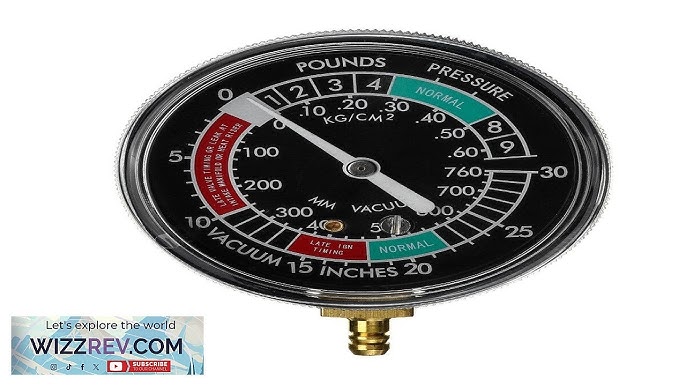
Understanding the essentials of a vacuum gauge is crucial before you start tuning your carburetor. A vacuum gauge helps you measure the pressure inside the intake manifold, giving you real-time feedback on engine performance. This feedback allows you to make precise adjustments to the carburetor for smoother running and better fuel efficiency.
Choosing The Right Gauge
Not all vacuum gauges are created equal. You want a gauge that reads in inches of mercury (inHg) or millimeters of mercury (mmHg), with a clear, easy-to-read dial. A 0-30 inHg range is typical and works well for most carburetor tuning tasks.
Consider the size and durability too. A smaller gauge might be easier to mount on your dashboard, while a rugged, metal-bodied gauge can handle rougher conditions. Avoid cheap plastic gauges—they tend to give inaccurate readings over time.
Setting Up The Gauge
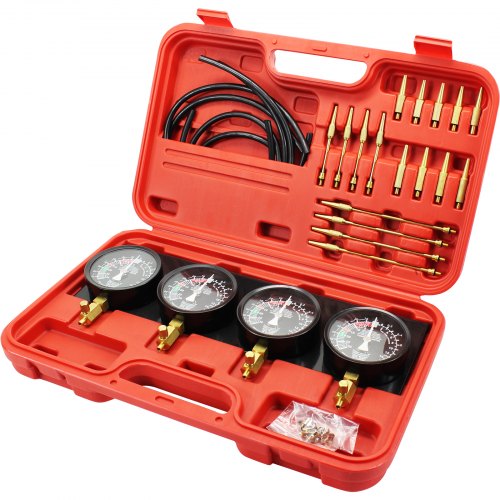
Proper setup is key to accurate readings. Connect the vacuum gauge to a vacuum port on the intake manifold or carburetor base. Make sure the hose fits snugly to avoid leaks that can throw off the reading.
Once connected, start your engine and let it idle. Watch the gauge needle stabilize; this is your baseline vacuum reading. If the needle fluctuates wildly, check the hose for leaks or blockages. A steady reading means you’re ready to tune.
Preparing For Tuning
Tuning a carburetor with a vacuum gauge requires careful preparation to get accurate readings and avoid damage. Skipping these initial steps can lead to frustration and poor results. Preparing properly sets the stage for smooth tuning and better engine performance.
Safety Precautions
Before you start, ensure your workspace is well-ventilated to avoid inhaling harmful fumes. Always wear safety goggles to protect your eyes from unexpected splashes or debris. Keep a fire extinguisher nearby, since gasoline vapors are highly flammable.
Disconnect any loose clothing or jewelry that could get caught in moving parts. Never work on a hot engine without gloves, as burns are common during tuning. Have someone nearby or inform someone about your activity for added safety.
Warm Up The Engine
Cold engines don’t provide reliable vacuum readings. Let your engine run for about 5 to 10 minutes until it reaches normal operating temperature. This ensures the carburetor and other components behave as they would during actual driving conditions.
Check the temperature gauge on your dashboard or feel the radiator hose to confirm the engine is warm but not overheating. Warm engine conditions help the vacuum gauge give you accurate feedback on air-fuel mixture adjustments.
Locate Vacuum Port
Finding the right vacuum port is crucial for attaching your vacuum gauge correctly. Look for a small, capped nipple on the carburetor or intake manifold labeled “vacuum” or “port.” Your vehicle’s manual can guide you if you’re unsure.
Remove any vacuum hoses connected to the port carefully to avoid damage. Attach your vacuum gauge hose securely to this port to prevent leaks that could distort your readings. A tight connection means more precise tuning results.
Reading Vacuum Levels
Reading vacuum levels with a gauge is essential for tuning your carburetor accurately. It provides real-time feedback about your engine’s performance and helps you spot issues early. But understanding what the needle or digital readout is telling you can be tricky without knowing how to interpret fluctuations and recognize normal versus abnormal readings.
Interpreting Gauge Fluctuations
When you watch the vacuum gauge, you’ll notice the needle doesn’t always stay perfectly steady. Minor fluctuations are normal because the engine’s intake valves open and close constantly.
However, large or erratic swings could signal a problem like a vacuum leak or ignition issue. If the needle bounces up and down rapidly, it might mean a misfire or worn valve. A slow, rhythmic fluctuation usually corresponds to normal engine cycles.
Ask yourself: Does the fluctuation match the engine speed and load? If not, your carburetor settings or engine components might need adjustment.
Identifying Normal Vs Abnormal Readings
Normal vacuum levels for most engines idle between 17 to 21 inches of mercury (inHg). If your gauge reads consistently within this range, your carburetor and engine are likely in good shape.
Abnormal readings include:
- Low vacuum (below 15 inHg):Possible causes are leaks, late ignition timing, or a rich carburetor mixture.
- High vacuum (above 22 inHg):This might indicate a lean mixture or advanced ignition timing.
- Sudden drops or spikes:Could mean sticking valves or vacuum leaks.
When I first tuned my motorcycle, I ignored a steady low vacuum reading. It turned out to be a tiny vacuum hose crack. Fixing it made the engine run smoother instantly. This shows how paying close attention to vacuum levels can save you from bigger headaches.
Adjusting Carburetor Settings
Adjusting the carburetor settings with a vacuum gauge lets you fine-tune your engine’s performance. This process helps you achieve the right air-fuel mixture and idle speed, ensuring smooth running and better fuel efficiency. You’ll need patience and a bit of practice, but the results are worth it.
Idle Mixture Screw Tuning
The idle mixture screw controls how much fuel mixes with air at idle. Start by turning the screw slowly while watching the vacuum gauge. Your goal is to find the highest steady vacuum reading, which means the mixture is just right.
Turning the screw too far in or out will cause the engine to run rough or stall. If you notice the vacuum drops or the engine sounds uneven, adjust the screw back slightly. Small changes make a big difference here.
Idle Speed Adjustment
Once the mixture is set, adjust the idle speed screw to get the right engine RPM. The vacuum gauge helps you keep the engine stable as you raise or lower the speed. Too high, and you waste fuel; too low, and the engine might stall.
It’s important to keep the engine running smoothly while adjusting speed. Use the gauge to confirm that the vacuum reading remains steady during this process. This balance keeps your engine healthy and responsive.
Fine-tuning For Smooth Operation
After setting mixture and speed, listen closely to your engine’s behavior. Is it idling smoothly without hesitation or popping? Use the vacuum gauge to make tiny tweaks to the mixture screw if needed.
Sometimes, small adjustments can solve issues like rough idling or sluggish acceleration. Don’t rush this step—fine-tuning takes time but results in a more reliable engine. How does your engine respond to subtle changes in the settings?
Credit: www.vevor.ca
Common Issues And Fixes
Tuning a carburetor with a vacuum gauge often reveals common problems. These issues can affect engine performance and fuel efficiency. Understanding these problems helps in fixing them quickly. Below are some typical issues and how to solve them.
Vacuum Leaks
Vacuum leaks cause the engine to run poorly. The gauge shows unstable or low vacuum readings. Check hoses and gaskets for cracks or loose fittings. Replace damaged parts immediately. Use carburetor cleaner to spot leaks by spraying around the intake manifold. The engine speed will change if there is a leak.
Incorrect Mixture
The air-fuel mixture may be too rich or too lean. A rich mixture causes black smoke and poor fuel economy. A lean mixture leads to rough idling and hesitation. Adjust the mixture screws slowly while watching the vacuum gauge. Aim for the highest steady vacuum reading. Small adjustments work best to find the perfect balance.
Stalling And Hesitation
Stalling happens when the engine does not get enough fuel or air. Hesitation feels like a delay when you press the gas pedal. Both issues show erratic vacuum gauge movements. Clean the carburetor jets and check the float level. Make sure the throttle linkage moves smoothly. These fixes often restore smooth engine response.
Testing And Verification
Testing and verification are crucial to make sure your carburetor tuning is spot on. After adjusting with a vacuum gauge, you need to confirm that the engine runs smoothly under different conditions. This step helps you catch any issues before hitting the road.
Rechecking Vacuum Gauge
Once you finish your initial adjustments, reconnect the vacuum gauge and watch the readings carefully. The gauge should show a steady, consistent vacuum level without sudden drops or spikes. If the needle fluctuates wildly, it’s a sign that the carburetor mixture or timing still needs fine-tuning.
Pay attention to the vacuum level at idle and during slight throttle openings. A healthy engine usually has a vacuum reading between 17 to 22 inches of mercury (inHg) at idle. If your numbers fall outside this range, revisit your adjustments until the gauge stabilizes.
Road Testing The Vehicle
Taking your vehicle for a test drive is the best way to confirm the tuning results. Monitor how the engine responds when accelerating, cruising, and decelerating. Notice if the engine hesitates, stalls, or feels sluggish—these are signs that the carburetor might still be off.
Try to drive on different terrains or at varying speeds to put the carburetor through real-world conditions. Does the engine maintain a smooth idle after you stop? If not, you might need to tweak the idle mixture screw again. Your goal is a responsive engine that performs reliably no matter the driving scenario.
Credit: www.goldwingfacts.com
Frequently Asked Questions
How Does A Vacuum Gauge Help Tune A Carburetor?
A vacuum gauge measures engine vacuum, revealing carburetor performance. It helps identify fuel-air mixture issues for precise adjustments. This tool ensures smooth engine idle, better fuel efficiency, and improved throttle response. Using it simplifies tuning by providing real-time feedback on engine condition.
What Is The Ideal Vacuum Reading For Carburetor Tuning?
The ideal vacuum reading typically ranges between 17 to 22 inches of mercury (inHg) at idle. Stable readings indicate a balanced fuel-air mixture. Fluctuations or low vacuum suggest leaks or improper carburetor settings needing adjustment for optimal engine performance.
How Do You Adjust The Carburetor With A Vacuum Gauge?
Start the engine and connect the vacuum gauge to the intake manifold. Adjust the idle mixture screws slowly until the vacuum reading peaks and stabilizes. This indicates the best fuel-air ratio. Fine-tune the idle speed to maintain steady vacuum and smooth engine operation.
Can A Vacuum Gauge Detect Carburetor Leaks?
Yes, a vacuum gauge can detect carburetor leaks by showing unstable or low vacuum readings. Sudden drops or fluctuations during idle suggest air leaks or worn gaskets. Identifying leaks helps prevent poor engine performance and ensures accurate carburetor tuning.
Conclusion
Tuning a carburetor with a vacuum gauge improves engine performance. It helps find the right air-fuel mix for smooth running. Small adjustments make a big difference in fuel efficiency. Using a vacuum gauge gives clear, precise feedback. This method saves time and avoids guesswork.
Practice these steps carefully to get steady engine idle. Keep your engine healthy and responsive with regular tuning. A well-tuned carburetor means better driving and fewer problems. Try it yourself and notice the difference quickly.