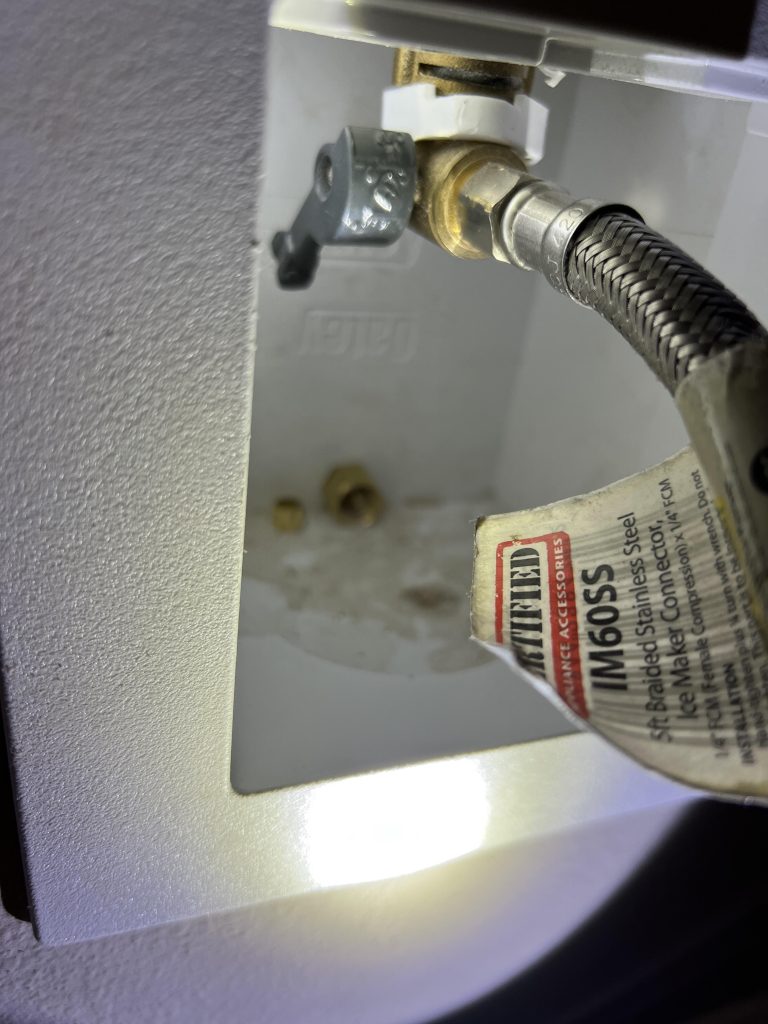
Dealing with a leaky ice maker or planning a kitchen renovation? You might be wondering how to turn off your ice maker water line safely.
This seemingly simple task can sometimes feel a bit daunting, especially if you’re worried about causing a mess or damaging your appliance. But don’t worry, you’ve come to the right place! In this guide, you’ll discover a straightforward, step-by-step process to confidently turn off your ice maker water line without any fuss.
Imagine the peace of mind knowing you’ve handled it all by yourself, avoiding any potential water-related mishaps. Ready to dive in and tackle this like a pro? Let’s make sure you’re equipped with all the knowledge you need!

Credit: www.amazon.com
Locate The Water Line
Finding the water line is the first step to turn off the ice maker’s water supply. This line delivers water from your home’s plumbing to the ice maker. It usually looks like a thin, plastic or copper tube. Knowing its location helps you stop water flow safely and quickly.
Identify The Ice Maker Connection
Check the back of your refrigerator or freezer. The water line connects near the bottom or rear side. You may see a small tube attached to the ice maker. It often runs through a hole in the refrigerator wall. This connection is where water enters the ice maker.
Look for a plastic or copper tube about 1/4 inch thick. The tube may be clear or white plastic. It should lead directly into the ice maker’s water valve. This valve controls water flow to the ice maker.
Trace The Water Supply Valve
Follow the water line from the refrigerator to the water source. The line usually connects to a small valve near the kitchen wall or under the sink. This valve controls water flow to the ice maker.
Turn the valve handle clockwise to shut off the water supply. The valve may be a small lever or knob. If you cannot find it, trace the line back to the main water supply. The valve is often located where the water line connects to your home’s plumbing.
Turn Off The Water Supply
Turning off the water supply to the ice maker is the first step to stop water flow safely. This prevents leaks and water damage during repairs or when disconnecting the ice maker. Knowing where and how to shut off the water helps avoid messes and saves time.
Use The Shutoff Valve
Locate the shutoff valve near the refrigerator or under the sink. This valve controls water flow to the ice maker. Turn the valve clockwise to close it. You should feel resistance as the valve shuts. After turning, check if water stops flowing by trying to dispense ice or water.
If the valve is old or hard to turn, use a pair of pliers gently. Avoid forcing it to prevent damage. Once closed, leave the valve in this position until you finish your work on the ice maker.
Alternative Methods To Stop Water Flow
If you cannot find the shutoff valve, try these options:
- Turn off the main water supply to the house. This stops water to all appliances, including the ice maker.
- Locate the water line connected to the ice maker and pinch it gently with pliers. This can slow or stop water flow temporarily.
- Disconnect the water line from the back of the refrigerator carefully. Use a towel to catch any dripping water.
Always prepare for small leaks by placing a bucket or towels under the water line. This keeps your floor dry and clean while working.
Disconnect The Water Line
Disconnecting the ice maker’s water line is a crucial step when you need to turn off the ice maker or perform maintenance. It stops the water flow, preventing leaks or water damage. Understanding how to safely disconnect the water line can save you time and hassle.
Tools Needed For Disconnection
- Adjustable wrench:Helps loosen the fittings without damaging them.
- Towel or small bucket:Catches any drips when you disconnect the line.
- Needle-nose pliers:Useful for gripping and pulling off tight connectors.
- Flashlight:Illuminates tight spaces behind the fridge.
- Shut-off valve access:Make sure you can reach and turn off the water supply before disconnecting.
Step-by-step Disconnection Process
First, locate the water supply valve behind or beneath your refrigerator. Turn it off completely to stop water flow.
Next, place a towel or bucket under the connection point to catch any residual water. Using your adjustable wrench, gently loosen the compression nut that secures the water line to the valve or fridge.
Once loose, carefully pull the water line free. If it feels stuck, use needle-nose pliers to gently wiggle it loose without bending or kinking the line.
After disconnecting, inspect the end of the water line and the valve for any debris or damage. Cleaning these parts can prevent leaks when you reconnect the line later.
Have you ever struggled with a stuck fitting? Taking your time and using the right tools makes a big difference in avoiding damage and leaks.

Credit: www.amazon.com
Drain Remaining Water
Draining the remaining water from the ice maker water line is essential before turning it off. This step prevents water from sitting in the line, which can cause leaks or freezing. Clearing out leftover water also helps maintain your appliance and avoid damage. Follow these simple tips to handle the water safely and cleanly.
Prevent Water Leakage
Water can drip or leak when disconnecting the water line. Prepare the area to avoid water damage. Turn off the main water supply to stop flow. Slowly release any pressure in the line by opening a nearby faucet. This action reduces the chance of sudden sprays or leaks. Check the connection points for any drips. Tighten or adjust fittings as needed before proceeding.
Use Towels Or Containers
Place towels or absorbent cloths under the water line connection. They catch small drips and spills during the draining process. Use a shallow container to collect water draining from the line. This method keeps the floor dry and clean. Dispose of collected water properly after draining. Having these tools ready makes the task easier and less messy.
Test The Ice Maker
Testing the ice maker after turning off the water line ensures it works properly. This step confirms no water leaks or blockages exist. It also helps identify if the ice maker needs a restart or further attention. Testing is simple and quick, saving time and effort later.
Check For Water Flow
Look at the ice maker’s water supply. Is water reaching the unit? Open the water valve slightly to see if water flows. Listen for sounds of water filling the tray. No water means the line may still be off or blocked. Ensure the water valve is fully open for proper flow.
Restarting The Ice Maker
After confirming water flow, restart the ice maker. Locate the reset button or switch on the unit. Press or toggle it to start the ice-making cycle. Watch the ice maker closely for any signs of operation. Ice should begin forming within a few hours if restarted correctly.

Credit: www.amazon.ca
Troubleshooting Tips
Troubleshooting your ice maker’s water line can save you time and avoid unnecessary repairs. Sometimes, the issue is simple and easy to fix, but other times, it might require a professional touch. Understanding common problems and knowing when to seek help can keep your ice maker running smoothly.
Common Issues And Fixes
Is your ice maker not producing ice or water leaking near the connection? These are frequent signs of water line troubles. Here are some common issues to check:
- Clogged or frozen water line:If the water flow stops, the line might be frozen. Try defrosting the line by unplugging the fridge or using a hairdryer carefully to warm the pipe.
- Loose or damaged connections:Check the water line fittings for leaks or looseness. Tighten any loose nuts and replace damaged tubing to prevent water spills.
- Faulty shut-off valve:If water keeps flowing despite turning off the valve, it may be stuck or broken. Test the valve by turning it on and off; replace it if it doesn’t respond.
- Water pressure problems:Low water pressure can cause the ice maker to stop working. Ensure the main water supply is fully open and free of blockages.
Have you checked these areas yet? Fixing a simple clog or tightening a connection might restore your ice maker without much hassle.
When To Call A Professional
If you’ve tried the basic fixes and the problem persists, it’s time to call an expert. Issues like persistent leaks, broken internal parts, or complex valve replacements require specialized tools and skills.
Attempting to fix these yourself can lead to bigger problems or water damage. Professionals can quickly diagnose hidden issues and ensure the water line and ice maker function safely and efficiently.
Wondering if your situation is urgent? If water is pooling near your fridge or you smell something unusual, don’t wait to get professional help. Quick action prevents costly repairs and keeps your home safe.
Frequently Asked Questions
How Do I Turn Off The Ice Maker Water Line?
Locate the water shut-off valve behind the refrigerator or under the sink. Turn it clockwise to stop water flow to the ice maker.
Where Is The Ice Maker Water Line Shut-off Valve?
The shut-off valve is usually behind the fridge or under the kitchen sink. It controls water supply to the ice maker.
Can I Turn Off The Ice Maker Without A Plumber?
Yes, you can turn off the water line yourself by closing the shut-off valve. No plumbing skills are needed.
Why Should I Turn Off The Ice Maker Water Line?
Turning off the water line prevents leaks during maintenance or when the ice maker is unused for a long time.
Conclusion
Turning off your ice maker water line is simple and quick. Just follow the easy steps explained above. This stops water flow and prevents leaks or flooding. Keep your kitchen safe and dry by acting fast. Remember to check the valve regularly to avoid problems.
Now you can handle this task with confidence. No need to call a plumber for small fixes. Save time and money by doing it yourself. Stay calm and take control of your ice maker water line today.