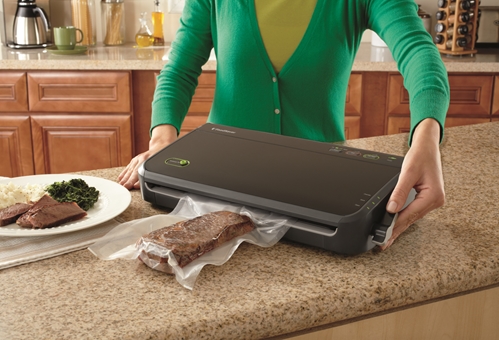
Do you want to keep your food fresh for longer and save money on groceries? Using a food saver vacuum sealer can make a huge difference in your kitchen.
It removes air from storage bags, locking in freshness and preventing freezer burn. But if you’ve never used one before, it might feel a bit tricky. Don’t worry—this guide will walk you through every step, making it simple and easy for you to start sealing your food like a pro.
Keep reading, and you’ll discover how this small device can transform the way you store food and reduce waste.

Credit: www.metromarket.net
Choosing The Right Vacuum Sealer
Choosing the right vacuum sealer can make a big difference in how well your food stays fresh and how easy the sealing process is. You want a model that fits your kitchen habits and the types of food you usually store. Before buying, think about what features matter most to you and how much you want to spend.
Types Of Vacuum Sealers
There are mainly two types of vacuum sealers: external and chamber sealers. External sealers are compact and perfect for home use, sealing bags from the outside. Chamber sealers are larger and better for heavy-duty sealing, often used in commercial kitchens.
Ask yourself if you mostly seal dry foods like chips or wet foods like soups. External sealers sometimes struggle with wet items, while chamber sealers handle them easily. Knowing what you’ll seal most often helps narrow down your choice.
Key Features To Consider
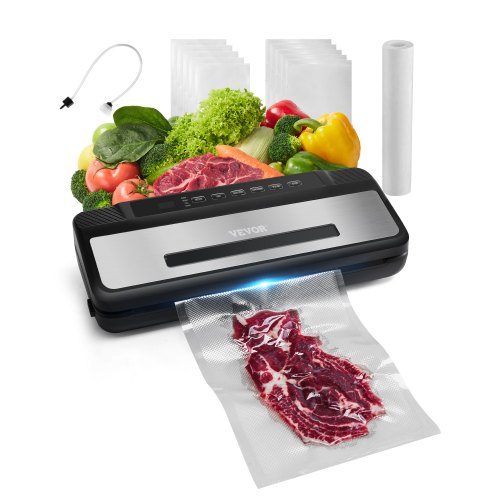
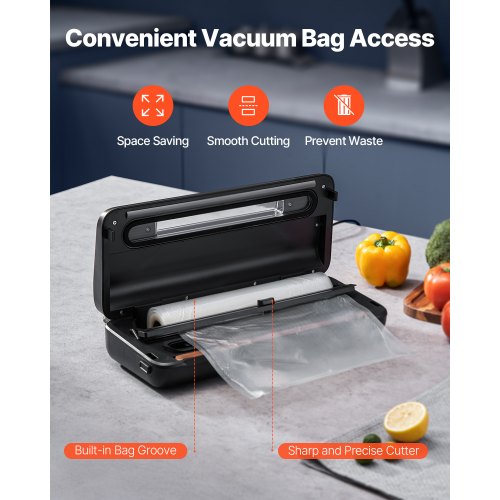
Look for features that match your sealing needs. Automatic sealing modes save time, while manual controls give you precision. Some models include a built-in bag cutter and storage rolls, which can be convenient.
Think about the sealing strip’s durability and whether the machine can handle different bag sizes. A strong vacuum pump ensures better air removal, which keeps food fresher longer. Also, check if the sealer offers a pulse option for delicate items like berries.
Budget And Brand Options
Your budget will shape the options available. Basic models start around $30 and cover simple sealing tasks. More advanced machines with extra features and stronger motors can cost $150 or more.
Brands like FoodSaver and Nesco offer reliable products with good customer service. Reading user reviews reveals real-life performance and durability. Have you checked how long warranties last? A longer warranty often signals confidence in the product’s quality.
Credit: www.vevor.ca
Preparing Food For Sealing
Preparing food before sealing is important for the best results. Proper preparation helps keep food fresh longer and prevents spoilage. It also makes sealing easier and cleaner. Follow simple steps to get your food ready for vacuum sealing.
Selecting Suitable Foods
Choose foods that seal well and store longer with a vacuum sealer. Fresh fruits, vegetables, meats, and cheeses work great. Avoid soft, juicy foods like watermelon or fresh tomatoes. These can get crushed or release too much liquid. Dry foods like nuts, grains, and dried herbs also seal well. Make sure the food is fresh and free from mold or spoilage.
Portioning And Packaging Tips
Cut food into portions that suit your needs. Smaller pieces freeze and thaw faster. Use bags or rolls designed for vacuum sealers. Leave enough space at the top for sealing. Arrange food flat and evenly for a good seal. Avoid overfilling the bag to prevent air pockets. For liquids, partially freeze before sealing to reduce mess.
Cleaning And Drying Food
Wash fruits and vegetables under cool water to remove dirt. Pat dry completely with paper towels. Excess moisture can cause freezer burn or spoilage. For meat and fish, trim excess fat and remove bones if needed. Dry the surface with a paper towel before sealing. Clean food ensures better sealing and longer storage life.
Operating The Food Saver Vacuum Sealer
Operating your Food Saver vacuum sealer might seem tricky at first, but it quickly becomes second nature. The key is understanding the machine’s setup, how it handles different foods, and the best ways to use its accessories and bags. Once you get the hang of these basics, you’ll save time and keep your food fresh like a pro.
Setting Up The Machine
Start by placing your Food Saver on a flat, clean surface near a power outlet. Make sure the vacuum channel and sealing strip are free of crumbs or moisture to ensure a perfect seal every time.
Plug in the machine and press the power button. Many models have indicator lights to guide you when the machine is ready. Have you checked if your model requires a warm-up period before sealing?
Sealing Different Food Types
Different foods require different vacuum sealing techniques. For dry foods like nuts or chips, you can seal directly using the dry mode to avoid crushing the contents.
For moist or juicy foods, such as marinated meats or fresh fruits, use the moist mode if your machine has one. This setting helps prevent liquid from being sucked into the vacuum channel, which can cause sealing issues.
Frozen foods benefit from sealing before freezing to avoid freezer burn, but make sure the food is cold enough to minimize liquid leakage during sealing. Have you tried sealing delicate items like berries in small batches to protect them?
Using Accessories And Bags
Food Saver offers various bag sizes and rolls. Rolls let you customize bag length, reducing waste. Cut the roll to the desired size, seal one end first, then fill and seal the other.
There are also specialized accessories for sealing jars, canisters, or containers. These tools expand your vacuum sealing options beyond bags, perfect for preserving leftovers or dry pantry items.
Remember to use only Food Saver-approved bags or rolls to ensure compatibility and the best sealing results. Have you explored how these accessories can simplify your food storage routine?
Maintaining Your Vacuum Sealer
Maintaining your food saver vacuum sealer keeps it working well and lasting longer. Regular care helps avoid problems and ensures fresh food every time. Simple steps can protect your investment and save time in the kitchen.
Cleaning And Care
Unplug the vacuum sealer before cleaning. Wipe the exterior with a damp cloth. Use mild soap if needed. Avoid harsh chemicals that can damage the surface.
Clean the sealing strip gently after each use. Remove food residue or moisture to prevent blockages. Check the drip tray regularly and empty it to avoid mold buildup.
Allow all parts to dry completely before reassembling. Store the machine in a dry, cool place. Keep the lid open to air out the sealing area.
Troubleshooting Common Issues
Vacuum sealer not sealing properly? Check for wrinkles or damage on the bag’s edge. Make sure the bag is placed correctly on the sealing strip.
If the vacuum is weak, clean the air intake and sealing area. Replace worn or dirty sealing strips. Check for a full drip tray that may block suction.
Machine won’t turn on? Inspect the power cord and outlet. Reset the machine if it has a reset button. Contact customer support if issues continue.
Replacing Parts And Accessories
Sealing strips wear out with use and should be replaced regularly. Use only compatible parts designed for your vacuum sealer model.
Replace the drip tray if cracked or damaged to avoid leaks. Check the vacuum pump for signs of wear and replace it if needed.
Keep extra bags and rolls on hand to prevent running out. Buy genuine accessories to ensure proper function and safety.
Maximizing Food Freshness
Maximizing food freshness with a Food Saver vacuum sealer means more than just removing air. It’s about understanding how to store your sealed items properly and knowing the best conditions to keep your food at its peak. You’ll extend shelf life, reduce waste, and enjoy meals that taste just as fresh as the day you packed them.
Storage Tips For Sealed Food
After sealing your food, store it in a cool, dry place if it’s dry goods like nuts or coffee. For perishable items, keep them in the fridge or freezer right away to stop bacteria from growing.
Label every bag with the date you sealed it. This simple habit helps you track freshness and avoid eating spoiled food.
Also, avoid stacking heavy items on top of sealed bags to prevent crushing and breaking the seal.
Freezing Vs Refrigerating
Freezing sealed food locks in freshness for months, especially for meats, vegetables, and leftovers. The vacuum seal prevents freezer burn and dehydration, keeping texture and flavor intact.
Refrigerating is best for items you plan to eat within a week, like cheese, fresh fruits, and cooked dishes. The vacuum seal slows spoilage by limiting oxygen exposure, so your food stays fresher longer than in regular containers.
Ask yourself: Would freezing change the texture or taste of this food? If yes, refrigeration might be the safer option.
Shelf Life Expectations
| Food Type | Refrigerated (Vacuum Sealed) | Frozen (Vacuum Sealed) |
|---|---|---|
| Raw Meat | 1-2 weeks | 1-3 years |
| Cooked Meals | 1-2 weeks | 2-3 months |
| Vegetables | 1-2 weeks | 2-3 years |
| Cheese | 4-8 weeks | 6 months |
These estimates give you a clear idea of how long you can expect your sealed food to last. Adjust based on your freezer’s temperature and the type of food you’re storing.
What’s the oldest sealed food you’ve tried that still tasted great? Share your experience and tips to help others get the most from their Food Saver!
Credit: www.vevor.ca
Creative Uses For Vacuum Sealing
Vacuum sealing offers more than just food storage. It helps save time, reduce waste, and keep items fresh longer. This tool works well for cooking, shopping, and even protecting things around the house. Discover how to use your vacuum sealer in creative ways that make daily tasks easier and more efficient.
Marinating And Sous Vide
Seal meats and vegetables with marinades for fast flavor absorption. The vacuum removes air, making the marinade work deeper and quicker. Use vacuum-sealed bags to cook food in a water bath for sous vide. This method keeps food juicy and tender, with even cooking throughout.
Bulk Buying And Meal Prep
Buy large amounts of food and divide into portions. Vacuum seal each portion to keep it fresh for months. This saves money and reduces trips to the store. Prepare meals ahead, seal them, and freeze for easy reheating later. It cuts cooking time on busy days.
Protecting Non-food Items
Seal important papers or electronics to keep them safe from moisture. Protect jewelry or small tools from dust and rust. Use vacuum sealing for travel to compress clothes and save space in bags. It also stops items from shifting and getting damaged.
Frequently Asked Questions
How Do I Prepare Food For Vacuum Sealing?
Clean and dry food before sealing. Cut large items into smaller portions. Remove any moisture to ensure a tight seal. This prevents spoilage and freezer burn, maintaining food freshness longer.
Can I Vacuum Seal Liquids With A Food Saver?
Yes, but freeze liquids first. This prevents liquid from being sucked into the machine. Once frozen, vacuum seal quickly to maintain freshness and avoid mess.
How Long Does Vacuum-sealed Food Last?
Vacuum sealing extends shelf life 2-5 times longer than regular storage. Frozen vacuum-sealed meats last up to 3 years. Fresh foods stored this way remain fresh for weeks.
What Bags Are Compatible With Food Saver Vacuum Sealers?
Use only Food Saver brand bags or BPA-free vacuum sealer bags. These are designed for optimal sealing and durability. Avoid regular plastic bags, as they may not seal properly.
Conclusion
Using a Food Saver Vacuum Sealer is straightforward and beneficial. It keeps food fresh longer. Sealing preserves flavor and nutrients. It reduces waste and saves money. Follow the steps carefully for best results. Practice makes the process easier. Soon, you’ll be sealing like a pro.
Enjoy fresher meals and less spoilage. A vacuum sealer is a handy kitchen tool. It supports healthy eating habits. Start today and see the difference. Happy sealing and fresh eating!