
Are you tired of watching your favorite foods go to waste or losing their freshness before you get a chance to enjoy them? If so, you’re about to discover a game-changer: the vacuum sealer.
This nifty kitchen gadget isn’t just for gourmet chefs; it’s for anyone who wants to keep their food fresher for longer. Imagine cutting down on waste, saving money, and savoring the taste of fresh produce and leftovers just as if they were newly made.
In this guide, you’ll learn step-by-step how to use a vacuum sealer to revolutionize your kitchen routine. Get ready to unlock the secrets to extending the life of your groceries and maximizing your meal prep efficiency. Stay with us, and soon you’ll wonder how you ever managed without it.
Choosing The Right Vacuum Sealer
Choosing the right vacuum sealer can make a big difference in how well your food stays fresh and how easy the sealing process is for you. With many options available, it’s important to focus on what fits your needs and budget. Think about how often you plan to use it and what types of food you want to preserve.
Types Of Vacuum Sealers
There are mainly two types of vacuum sealers: external and chamber. External sealers are great for everyday use and work well with dry foods like chips or nuts. Chamber sealers are more versatile—they can handle liquids and wet foods because the entire bag goes inside the machine.
If you want something simple and affordable, external models might suit you best. But if you often freeze soups or marinate meats, a chamber sealer is worth considering despite the higher price.
Key Features To Consider
Look for features that match your lifestyle. Automatic sealing is helpful if you want a hands-free experience, while manual controls give you more precision. Some models have built-in bag cutters and roll storage, which can save time and reduce waste.
Powerful suction is essential for removing all air, but also check how easy it is to clean the device. Would you prefer a compact model to save kitchen space? These small details can affect your daily use more than you think.
Best Models For Home Use
- FoodSaver V4840:Offers reliable sealing with adjustable settings and a built-in roll storage. Ideal for beginners and experienced users alike.
- NutriChef PKVS18SL:A budget-friendly option that is compact and simple to operate, perfect for occasional sealing.
- VacMaster VP210:A chamber vacuum sealer that works well for preserving liquids and bulk food, suitable for serious home cooks.
Choosing the right model depends on your sealing frequency and food types. What features matter most to you when you think about preserving your meals?
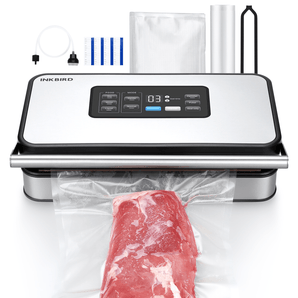
Credit: inkbird.com
Preparing Food For Sealing
Preparing food for sealing is an important step to keep your food fresh and safe. Proper preparation helps the vacuum sealer work better. It also stops food from spoiling or getting freezer burn.
Each type of food needs special care before sealing. Taking time to prepare food right saves money and reduces waste.
Proper Food Portions
Cut food into small, even portions. Large pieces do not seal well. Small portions fit bags better and freeze faster.
Separate food into meal sizes. This helps when you want to cook only what you need. Avoid overfilling the bag. Leave space at the top for sealing.
Cleaning And Drying Tips
Clean food removes dirt and bacteria. Rinse fruits and vegetables under cold water. Pat dry with a clean cloth or paper towel.
Make sure food is dry before sealing. Moisture can stop the vacuum sealer from working. Wet bags may not seal tightly.
Avoiding Common Mistakes
- Do not overfill the bag. It blocks air removal and weakens the seal.
- Avoid sharp edges in the bag. Cut food into smaller pieces to prevent punctures.
- Keep the sealing area clean and free of crumbs or liquids.
- Do not seal hot food. Let it cool to avoid steam inside the bag.
- Check the bag for holes or tears before use.
Step-by-step Sealing Process
Mastering the vacuum sealing process is easier than you might think. Each step plays a crucial role in preserving your food’s freshness and extending its shelf life. Let’s break down the process so you feel confident every time you use your vacuum sealer.
Setting Up The Machine
First, place your vacuum sealer on a flat, stable surface near an electrical outlet. Plug it in and make sure it’s clean and dry before turning it on. Check that the sealing strip inside is free from crumbs or residue; a clean strip ensures a tight seal.
Some machines have different settings for moist or dry food—choose the correct one to avoid sealing issues. Have you noticed how adjusting settings based on food type can drastically improve your sealing success? It’s a small step with a big impact.
Placing Food In Bags
Use bags designed specifically for vacuum sealers to prevent punctures or leaks. Leave enough space at the open end—about 3 to 4 inches—to allow the machine to grip the bag properly. Avoid overfilling; squished food can block the air removal and create an uneven seal.
Arrange items flat inside the bag to maximize storage space and sealing quality. Have you ever tried sealing bulky or oddly shaped items? Cutting them into smaller portions often makes the process much smoother.
Sealing And Vacuuming Tips
- Double-check the bag edge:Make sure the sealing area is dry and free from food particles.
- Hold the bag steady:Keep it straight and taut during the vacuum process to avoid wrinkles that can break the seal.
- Use the pulse function if available:This lets you control how much air is removed, perfect for delicate items that might get crushed.
- Inspect the seal:After sealing, gently press near the seal line. If it feels loose or you see wrinkles, reseal it for safety.
What’s your biggest challenge with vacuum sealing? Taking a moment to adjust these small details can turn a frustrating experience into a quick and satisfying one.

Credit: avidarmor.com
Storing Vacuum-sealed Foods
Storing vacuum-sealed foods extends their freshness and reduces waste. Proper storage maintains quality, taste, and safety over time. This section covers key tips for freezer and pantry storage and outlines shelf life expectations.
Freezer Storage Tips
- Label each bag with the date and contents before freezing.
- Remove excess air to prevent freezer burn and maintain texture.
- Place bags flat to save space and speed up freezing.
- Keep the freezer temperature at 0°F (-18°C) or lower.
- Use vacuum-sealed meat within 1-3 years for best quality.
Pantry Storage Ideas
- Store vacuum-sealed dry goods like nuts and grains in a cool, dark place.
- Avoid heat, moisture, and direct sunlight to preserve freshness.
- Organize bags by type and date for easy access.
- Check seals regularly to ensure airtightness.
Shelf Life Expectations
| Food Type | Regular Storage | Vacuum-Sealed Storage |
|---|---|---|
| Raw Meat (Freezer) | 6-12 months | 1-3 years |
| Cooked Food (Freezer) | 2-3 months | 1-2 years |
| Dry Goods (Pantry) | 6-12 months | 1-2 years |
| Cheese (Refrigerator) | 1-2 weeks | 4-8 weeks |
Saving Money With Vacuum Sealing
Saving money is one of the biggest benefits of using a vacuum sealer in your kitchen. It helps you control food costs by extending the life of groceries and allowing smarter shopping choices. How often have you thrown away food that spoiled too quickly or paid more because you bought smaller, more expensive packages?
Buying In Bulk
Buying in bulk saves money, but only if you can store the food properly. Vacuum sealing lets you portion large quantities of meat, cheese, or vegetables into smaller, manageable packs. This way, you avoid paying premium prices for smaller packages at the store.
Imagine buying a large pack of chicken breasts on sale and sealing each portion individually. You can freeze them without worrying about freezer burn, and use exactly what you need when you need it. This method reduces impulse buys and frequent trips to the store.
Reducing Food Waste
Food waste is a hidden drain on your budget. Vacuum sealing removes air that causes spoilage and freezer burn, keeping food fresh much longer. With your food protected, you won’t find yourself tossing out half-used bags of vegetables or stale leftovers.
Consider how much money you lose each week from spoiled food. Vacuum sealing helps you save that money by preserving freshness for days or even weeks. What could you do with the extra cash if your food lasted longer?
Meal Prep And Planning
Vacuum sealing makes meal prep and planning easier and more cost-effective. You can prepare meals or ingredients in advance, seal them, and store without worrying about loss of flavor or texture. This reduces the temptation to order takeout or buy convenience foods.
Try sealing pre-chopped vegetables, marinated meats, or entire meals in portion sizes that suit your schedule. This practice saves you both time and money during busy weeks, while helping you stick to a budget. How much could you save by cutting down on last-minute food purchases?
Maintaining Your Vacuum Sealer
Maintaining your vacuum sealer is key to keeping it working smoothly and extending its lifespan. Regular attention helps avoid common problems and ensures every seal is airtight. Let’s dive into simple ways you can care for your machine, spot issues early, and know when parts need a swap.
Cleaning And Care
After each use, wipe the sealing strip and the area around it with a damp cloth. Avoid harsh chemicals; mild soap and water work best. Residue buildup from food can affect the seal quality, so clean spills immediately.
Check the vacuum chamber or nozzle for crumbs or moisture. Dry it thoroughly before storing your sealer to prevent mold or corrosion. You might be surprised how a quick clean after every session saves you from a costly repair later.
Troubleshooting Common Issues
If your vacuum sealer isn’t sealing properly, first check if the bag is placed correctly. Bags must lie flat without wrinkles over the sealing strip. Have you ever noticed your sealer stops sucking out air? That could mean the gasket is loose or dirty.
Another common issue is overheating. If the machine pauses or shuts off, give it a break to cool down. If problems persist, try reseating the sealing strip or replacing the bag. These small fixes often get your sealer back on track quickly.
When To Replace Parts
Some parts wear out over time. The sealing strip, for example, can crack or lose stickiness, which means it’s time for a replacement. Keep an eye on the gasket too—if it looks cracked or warped, it won’t create a proper vacuum.
Vacuum bags and rolls should also be replaced regularly to avoid leaks. If your sealer has a removable drip tray, empty it and check for cracks or damage. Replacing worn parts promptly keeps your machine performing like new.
Creative Uses For Vacuum Sealers
Vacuum sealers are not just for storing food longer; they can transform the way you prepare meals and even assist in unexpected household tasks. Using a vacuum sealer creatively can save you time, enhance flavors, and protect valuable items. Have you ever thought about how this simple tool could change your cooking and organization habits?
Marinating And Flavoring
Vacuum sealing speeds up marinating by forcing flavors deep into the food. The vacuum removes air, allowing marinades to penetrate meat, fish, or vegetables in minutes rather than hours.
If you want tender steak or flavorful chicken quickly, seal it with your favorite marinade and watch the difference. You can even experiment with new spices or sauces without waiting all day.
Sous Vide Cooking
Sous vide cooking relies on precise temperature control, and vacuum sealers are essential for sealing food airtight. This method locks in moisture and flavors while cooking food evenly.
Try sealing fish, chicken, or vegetables before placing them in a water bath. You’ll get perfect texture and taste every time, making your meals restaurant-quality without extra effort.
Non-food Applications
Vacuum sealers can protect more than just food. Use them to keep important documents, jewelry, or electronics safe from moisture and air damage.
Travelers find vacuum sealers handy for compressing clothes and saving luggage space. Have you ever wished you could pack more efficiently? This might be the solution you didn’t know you needed.

Credit: freskoshop.com
Frequently Asked Questions
How Does A Vacuum Sealer Work?
A vacuum sealer removes air from bags to preserve food freshness. It creates a tight seal, preventing spoilage and freezer burn. This extends the shelf life of food significantly and maintains flavor and nutrients.
What Foods Can I Vacuum Seal Safely?
You can vacuum seal meats, vegetables, fruits, cheese, and cooked meals. Avoid sealing soft cheeses and fresh mushrooms without pre-freezing. Vacuum sealing is great for dry and moist foods alike.
How Long Does Vacuum Sealed Food Last?
Vacuum sealed food lasts 2-5 times longer than regular storage. For example, vacuum sealed meat can last up to 2-3 years in the freezer. Proper sealing and storage conditions affect the shelf life.
Can I Reuse Vacuum Sealer Bags?
Reusing vacuum sealer bags is not recommended for food safety reasons. Some bags can be reused if they are undamaged and cleaned properly. Always check manufacturer guidelines for reuse instructions.
Conclusion
Using a vacuum sealer helps keep food fresh longer. It saves space in your fridge and freezer. This tool also cuts down on food waste. Sealing food tightly locks in flavor and nutrients. You can store fruits, vegetables, meat, and more.
It is easy to use with just a few steps. Try sealing your leftovers to enjoy them later. A vacuum sealer makes meal prep simple and quick. Give it a try and see the benefits yourself.