Are your brakes feeling spongy or unresponsive? It might be time to vacuum bleed them.
You don’t need to be a seasoned mechanic to take on this task. With the right guidance, you can ensure your vehicle’s braking system is in top shape, enhancing your safety on the road. In this guide, you’ll learn a simple yet effective method to maintain your brakes.
Imagine driving with complete peace of mind, knowing your brakes will respond when you need them most. Keep reading to discover how you can easily vacuum bleed your brakes and keep your car performing at its best.
Why Vacuum Bleeding Matters
Vacuum bleeding is essential for maintaining your brake system. It removes air bubbles trapped in brake lines. Air in the brake system can cause a soft or spongy brake pedal. This leads to poor brake response and longer stopping distances. Proper vacuum bleeding ensures the brakes work as they should, keeping you safe on the road.
Benefits For Brake Performance
Vacuum bleeding improves brake performance in several ways:
- Restores firm brake pedal feel for better control.
- Ensures consistent hydraulic pressure for reliable braking.
- Reduces brake fade during heavy use.
- Helps maintain even brake force to all wheels.
- Prevents brake system damage caused by trapped air.
Common Brake Problems Fixed
Vacuum bleeding can fix many common brake issues:
- Soft or spongy brake pedal feel.
- Longer stopping distances and poor brake response.
- Uneven braking or pulling to one side.
- Brake warning lights caused by low brake fluid pressure.
- Noisy brakes due to air in the system.

Credit: www.amazon.ca
Tools Needed For Vacuum Bleeding
Vacuum bleeding brakes requires specific tools for a smooth and safe process. Having the right equipment makes the job easier and helps avoid air bubbles in the brake lines. This section covers the essential tools needed for vacuum bleeding.
Vacuum Pump Options
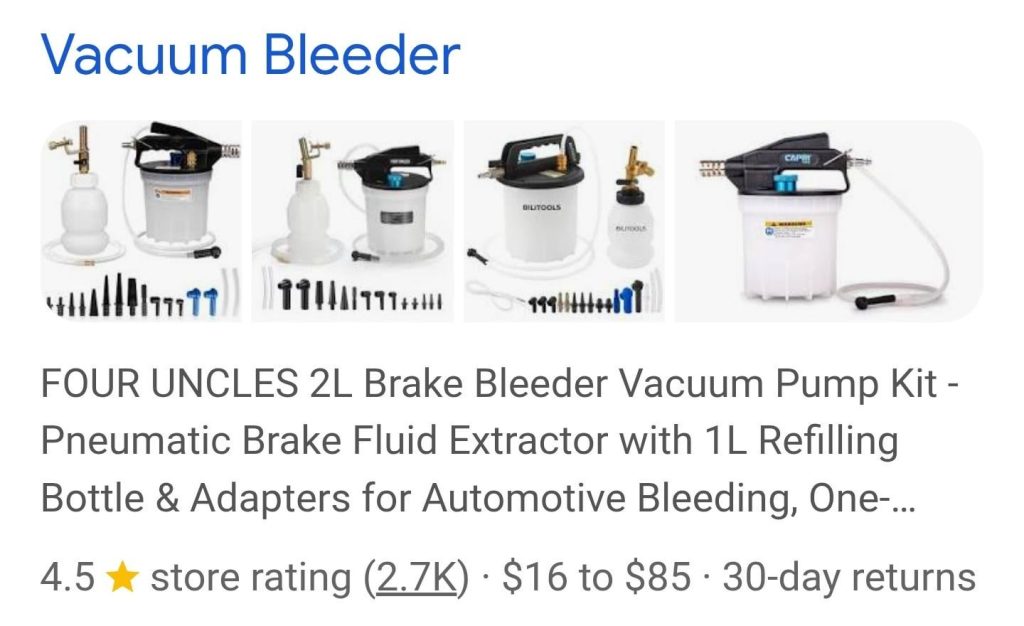
A vacuum pump creates suction to remove air from brake lines. Choose a pump that fits your needs and budget. Handheld manual pumps are affordable and easy to use. Electric vacuum pumps provide consistent suction but cost more.
- Manual vacuum pump with gauge
- Electric vacuum pump
- Brake bleeder kit with vacuum pump
Make sure the pump includes a pressure gauge. This helps monitor the vacuum level for safety and efficiency. Also, check the pump’s compatibility with brake fluid types.
Additional Supplies
Several other tools help make vacuum bleeding easier and cleaner. Prepare these items before starting the job.
- Clear plastic tubing to connect the pump to the bleeder valve
- Wrenches or sockets to open bleeder valves
- Brake fluid that matches your vehicle’s specifications
- Catch container for old brake fluid
- Rags or paper towels for spills
- Protective gloves and safety glasses
Using clear tubing lets you see air bubbles leaving the system. A clean work area prevents dirt from entering brake lines. Safety gear protects your skin and eyes from brake fluid.
Preparing Your Vehicle
Preparing your vehicle before vacuum bleeding brakes sets the foundation for a smooth process. Proper preparation reduces risks and helps the job go faster. Focus on safety, knowing where key parts are, and checking your brake fluid level.
Safety Precautions
Wear gloves and safety glasses to protect your hands and eyes. Work on a flat surface and use wheel chocks to stop the vehicle from moving. Keep the engine off and avoid smoking or open flames nearby. Brake fluid can harm paint and skin, so handle it carefully.
Locating Bleeder Valves
Find the bleeder valves on each brake caliper or wheel cylinder. These small screws release air and fluid during bleeding. Check your vehicle’s manual for exact locations. Clean around the valves to prevent dirt from entering the brake system.
Checking Brake Fluid
Open the brake fluid reservoir under the hood. Make sure the fluid level is between the minimum and maximum marks. Use the correct type of brake fluid for your vehicle. If the fluid is dark or dirty, consider replacing it before bleeding the brakes.
Step-by-step Vacuum Bleeding
Vacuum bleeding your brakes is a reliable way to remove air bubbles and improve brake performance. This process uses a vacuum pump to draw fluid through the brake lines, ensuring a clean and efficient bleed. Let’s walk through the essential steps to get this done right.
Setting Up The Vacuum Pump
Start by attaching the vacuum pump to the brake bleeder valve on the wheel you’ll be working on. Make sure the pump’s hose fits snugly to prevent air leaks, which could mess up the process.
Keep your brake fluid reservoir open but covered to avoid dirt getting in. Check that the fluid level is high enough before starting, since low fluid can introduce more air into the system.
Bleeding Each Wheel
Open the bleeder valve slowly and let the vacuum pump draw the brake fluid through the system. Watch the fluid flow carefully — you want to see a steady stream without bubbles.
Close the valve once the fluid runs clear and free of air. Repeat this for each wheel, usually starting with the wheel farthest from the master cylinder. This order helps push trapped air out more effectively.
Maintaining Fluid Levels
Keep a close eye on the brake fluid reservoir throughout the process. If the level drops too low, air can get sucked back into the brake lines, undoing your work.
Top off the reservoir with fresh brake fluid as needed to maintain a steady supply. This small detail can save you from repeating the entire bleeding process later.
Troubleshooting Common Issues
Vacuum bleeding brakes is a reliable way to remove air from your brake lines, but sometimes things don’t go as planned. Troubleshooting common issues can save you time and frustration. Knowing what to look for helps you fix problems quickly and get your brakes working perfectly again.
Air Bubbles Persist
If you still see air bubbles after vacuum bleeding, it usually means air is trapped somewhere in the system. Check all the brake lines and connections for leaks or loose fittings. Sometimes, the master cylinder needs to be bled separately because air can get trapped inside it.
Try pressing the brake pedal slowly while you vacuum bleed to help move stubborn bubbles out. If bubbles keep coming back, you might need to open bleed screws on each wheel one more time to ensure all the air is out. Have you double-checked the fluid level? Low fluid can cause air to get sucked back in.
Low Brake Pedal Pressure
Low brake pedal pressure after bleeding usually points to air still in the lines or a problem with the brake fluid. Make sure you used the correct brake fluid type and that the reservoir is full. Contaminated or old brake fluid can affect pedal feel and braking power.
If the pedal feels soft or sinks to the floor, you might have a leak or a failing master cylinder. You can test this by holding steady pressure on the pedal—if it gradually sinks, the issue is likely internal. Have you checked all brake lines and hoses for damage or cracks that could cause fluid loss?
Leaks And Fluid Loss
Spotting fluid leaks means brake fluid is escaping, reducing system pressure and safety. Inspect around each wheel’s bleed screw, brake lines, and calipers for wet spots or drips. Even small leaks can cause big problems, so don’t ignore them.
Leaks often occur at old or damaged rubber hoses and fittings. Tighten loose connections carefully, but avoid overtightening which can cause damage. What tools do you have on hand to handle these repairs? Having the right wrenches and brake fluid handy can make fixing leaks much easier.

Credit: wilmarllc.com
Tips For Long-term Brake Care
Keeping your brakes in top shape goes beyond just vacuum bleeding them once. Long-term care is about creating good habits and knowing the signs your system needs attention. This keeps your braking smooth and safe every time you hit the road.
Regular Maintenance Schedule
Set a clear schedule for brake maintenance. Check your brake fluid level and condition every few months. Old or contaminated fluid can cause corrosion and reduce braking efficiency.
Make it a habit to inspect brake pads and rotors regularly. Worn parts can lead to poor braking performance and may damage other components. Keeping these parts in good shape reduces the chance you’ll need emergency brake repairs.
Remember to flush your brake fluid at least every 2 years or as recommended by your vehicle’s manual. Fresh fluid helps prevent moisture buildup, which can cause brake failure. Staying ahead with these checks saves you time and money in the long run.
Signs You Need To Bleed Brakes Again
Pay attention to how your brakes feel. Does the pedal feel soft or spongy when you press it? This often means air is trapped in the brake lines and you need to bleed the brakes again.
Notice any strange noises or a decrease in braking power? These can also signal the need for bleeding. Sometimes, even if you don’t see leaks, air can enter the system after repairs or after replacing brake parts.
Ask yourself: when was the last time you bled your brakes? If it’s been a while, or you’re unsure, it’s worth checking. Timely bleeding prevents bigger problems and keeps your brakes responsive.
Credit: www.vintage-mustang.com
Frequently Asked Questions
What Is Vacuum Brake Bleeding?
Vacuum brake bleeding removes air from brake lines using a vacuum pump. It ensures better brake pedal feel and performance. This method is faster and cleaner than traditional bleeding. It prevents air bubbles that cause spongy brakes and improves overall safety.
How Do I Prepare For Vacuum Bleeding Brakes?
First, gather a vacuum pump, brake fluid, and clear tubing. Park your car on a flat surface and secure it. Check the brake fluid reservoir level. Wear gloves and eye protection. Ensure the engine is off before starting the bleeding process.
How Long Does Vacuum Brake Bleeding Take?
Vacuum brake bleeding typically takes 15 to 30 minutes. Time varies based on the vehicle’s brake system condition. Each wheel usually requires a few minutes to bleed properly. Patience ensures all air bubbles are removed for effective braking.
Can Vacuum Bleeding Brake Fluid Remove Old Fluid?
Yes, vacuum bleeding can remove old brake fluid efficiently. It pulls out contaminated fluid and trapped air from the brake lines. Replacing old fluid improves braking safety and prevents corrosion inside the system. Always top off with fresh brake fluid after bleeding.
Conclusion
Vacuum bleeding brakes keeps your car safe and working well. It removes air from brake lines quickly and easily. Always check for leaks and top up brake fluid. Use the right tools and follow steps carefully. Regular brake maintenance saves money and prevents accidents.
Keep your brakes responsive for a smooth drive. Simple care makes a big difference on the road. Try vacuum bleeding to keep brakes in top shape.