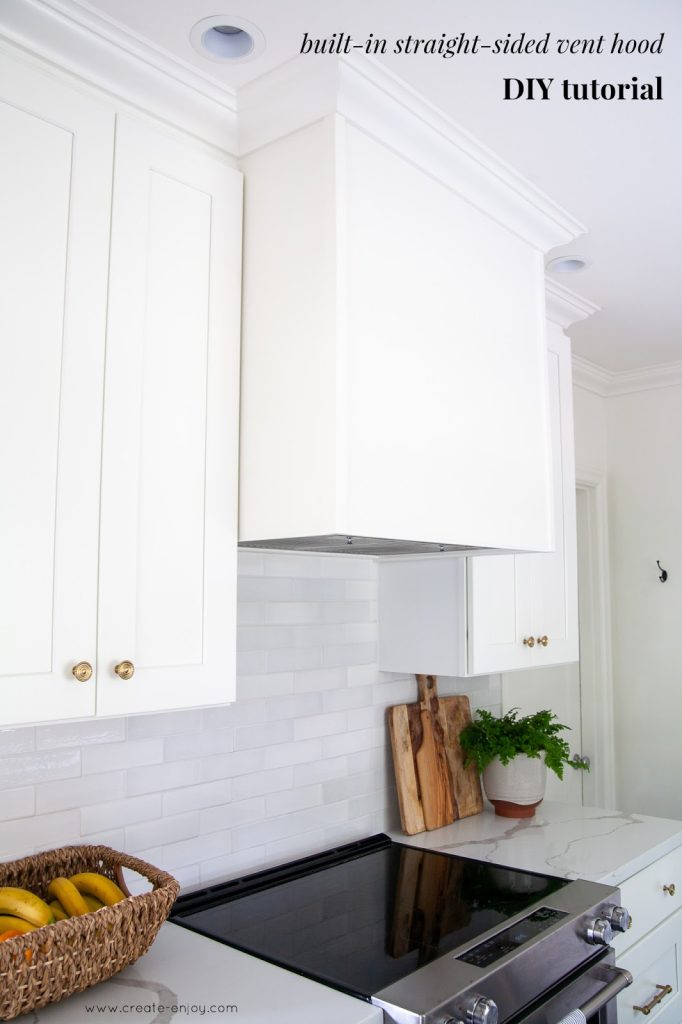
If you’ve ever wondered how to vent your range hood through a side wall, you’re in the right place. Proper ventilation is key to keeping your kitchen fresh and free of smoke, odors, and grease.
But venting through a side wall can feel tricky if you’re not sure where to start. Don’t worry—this guide will walk you through each step clearly and simply. By the end, you’ll know exactly how to get your range hood working efficiently and keep your cooking space comfortable.
Ready to make your kitchen better? Let’s dive in.
Choosing The Right Range Hood
Choosing the right range hood means ensuring proper ventilation through a side wall. This keeps air fresh and removes cooking odors effectively. Installing the vent correctly helps avoid leaks and improves kitchen airflow.
Choosing the right range hood for venting through a side wall can be a game-changer for your kitchen’s functionality and style. A well-chosen range hood not only efficiently expels smoke and odors but also adds a sleek aesthetic touch. But, how do you ensure you pick the perfect one for your kitchen?Types Of Range Hoods
Range hoods come in various styles, each catering to different needs and kitchen designs. Wall-mounted hoods are popular for their impressive coverage and bold presence. If you have an island cooktop, consider island hoods that hang from the ceiling for an open, airy look. Under-cabinet hoods are perfect for those who prefer a more discreet option, tucking neatly below your kitchen cabinets. Consider your kitchen layout and cooking habits when choosing the type of hood.Size And Power Considerations
Size matters! Your range hood should cover at least the entire width of your cooktop for optimal performance. If your cooktop is particularly powerful, opting for a slightly larger hood can ensure efficient smoke capture. Power is measured in cubic feet per minute (CFM). A higher CFM means better ventilation, especially important if you frequently cook greasy or aromatic foods. Think about your cooking style and kitchen size when determining the CFM you need. Have you ever found yourself overwhelmed by smoke while frying? A powerful range hood can make such situations a thing of the past, allowing you to focus on your culinary creations without worry. Choosing the right range hood is more than just a functional decision—it’s about enhancing your cooking experience and kitchen ambiance. What factors are most important to you when selecting a range hood?Planning The Vent Location
Planning the vent location is a key part of installing a range hood. Choosing the right spot ensures proper airflow and keeps your kitchen fresh. This stage helps avoid problems like leaks or blockages later. Careful planning makes the installation smoother and the vent more effective.
Selecting The Side Wall
Pick a side wall close to the range hood for a shorter vent path. This reduces the chance of air leaks and saves energy. Avoid walls that face busy streets or neighbors to reduce noise and odors. Check if the wall is thick enough to hold the vent securely. A strong wall prevents damage and supports the vent well.
Checking For Obstacles
Look inside the wall for pipes, wires, or studs before cutting. These can block the vent or cause safety hazards. Use a stud finder or wall scanner to locate obstacles accurately. Make sure the vent does not interfere with electrical or plumbing lines. Clear space inside the wall allows smooth airflow and easy installation.
Measuring Vent Placement
Measure the height from the cooktop to the vent opening carefully. Follow the range hood manufacturer’s recommended height for best performance. Mark the exact spot on the wall to avoid mistakes during cutting. Double-check measurements to ensure the vent aligns perfectly with the hood. Proper placement improves ventilation and kitchen safety.
Gathering Tools And Materials
Before venting a range hood through a side wall, gather all necessary tools and materials. This preparation saves time and ensures a smooth installation. Having everything ready helps avoid interruptions and frustration. Focus on tools and materials that match your specific range hood and wall type.
Essential Tools List
- Measuring tape – for accurate cuts and placement
- Drill with various bits – for making holes in walls
- Jigsaw or reciprocating saw – to cut the vent hole
- Level – to keep the vent straight
- Screwdriver set – for securing screws and brackets
- Caulking gun – to seal gaps around the vent
- Utility knife – to trim insulation or tape
- Stud finder – to locate wall studs for secure mounting
- Protective gloves and safety glasses – for safe handling
Required Venting Materials
- Metal ducting – usually aluminum or galvanized steel tubes
- Wall vent cap – prevents pests and weather entry
- Vent hood or cover – directs airflow outside
- Foil tape – seals duct joints tightly
- Metal screws – secure duct pieces and vent cap
- Insulation wrap – reduces heat loss and condensation
- Sealant or caulk – waterproofs around vent edges
- Backdraft damper – stops outside air from coming in
Marking And Cutting The Wall
Marking and cutting the wall is a crucial step for venting a range hood through a side wall. It requires careful planning and precision to ensure the vent fits properly and avoids structural or electrical issues. This process starts with identifying safe spots on the wall, then marking the vent hole accurately, followed by cutting the wall with care to maintain safety and cleanliness.
Locating Studs And Wiring
Studs provide support inside the wall and must be avoided. Use a stud finder to locate them easily. Mark the edges of each stud with a pencil. Wiring and plumbing may run inside the wall. Turn off power to the area before checking for wires. A wire detector helps find hidden electrical lines. Mark their locations clearly to avoid damage during cutting.
Marking The Vent Hole
Measure the range hood vent size carefully. Transfer these dimensions to the wall surface. Use a level to draw straight lines for the vent hole. Double-check measurements to ensure accuracy. Mark the outline clearly with a pencil. This outline guides the cutting and keeps the hole neat and precise.
Safe Wall Cutting Techniques
Wear safety glasses and a dust mask. Cut slowly along the marked lines with a drywall saw. Avoid pushing too hard to prevent wall damage. Remove the cut piece carefully. Check the hole for smooth edges. Use sandpaper to smooth rough spots if needed. Clean the area to remove dust before installing the vent.
Installing The Vent Hood
Installing the vent hood properly ensures efficient airflow and safety. This step involves attaching the vent cap outside your home and securing it tightly. A well-installed vent prevents leaks and keeps the system working well. Follow clear steps to fit and seal the vent hood correctly.
Fitting The Vent Cap
Choose a vent cap that matches your duct size. Place it on the outside wall where the duct ends. Align the cap so the vent openings face down to block rain. Use screws to fix the vent cap firmly to the wall. Check that the cap sits flush against the surface to avoid gaps.
Sealing And Securing The Vent
Seal around the vent cap with waterproof caulk or sealant. Apply a bead of sealant along the edges for a tight seal. Press the sealant firmly to fill all cracks and holes. Use metal screws to secure the vent cap firmly in place. Ensure the vent hood is stable and cannot move in wind or rain.

Credit: www.create-enjoy.com
Connecting The Ductwork
Connecting the ductwork is a key part of venting a range hood through a side wall. Proper connection ensures efficient airflow and prevents leaks. It also helps reduce noise and keeps your kitchen fresh. Attention to detail during this phase improves overall performance and safety.
Choosing The Right Duct Type
Select ducts made from rigid metal for best airflow. Aluminum or stainless steel ducts resist corrosion and heat. Avoid flexible plastic or foil ducts as they trap grease and reduce airflow. The duct size should match the range hood’s outlet to maintain proper ventilation. Larger ducts move air more efficiently and lower noise.
Attaching Ducts To Range Hood And Vent
Start by aligning the duct outlet with the range hood vent collar. Slide the duct over the collar firmly. Use metal screws to secure the duct to the collar. Attach the other end of the duct to the wall vent. Ensure the duct is straight and does not sag to prevent airflow problems. Avoid sharp bends that can block air.
Securing And Sealing Joints
Secure all duct joints with sheet metal screws for a tight fit. Wrap aluminum foil tape around each joint to seal gaps. Do not use duct tape, as it fails under heat and moisture. Proper sealing stops air leaks and keeps the system efficient. Check for loose connections and tighten as needed.
Testing And Final Adjustments
Testing and final adjustments make sure your range hood works well. This step checks if air flows properly and seals are tight. Proper testing prevents problems like poor ventilation or noise. Take time to verify everything before finishing the project.
Checking Airflow Efficiency
Turn on the range hood to test airflow. Stand outside near the vent to feel the air moving. Use a piece of tissue or paper to see if it moves with the airflow. The paper should flutter or hold steady against the vent.
Measure airflow using an anemometer if available. It helps check if air moves fast enough. Compare the reading with the manufacturer’s recommended airflow rate. Low airflow means you may need to clear blockages or adjust duct size.
Fixing Leaks And Gaps
Inspect all duct connections for leaks or gaps. Use your hand to feel air escaping around joints. Look for visible cracks or holes that let air out. Seal gaps with metal foil tape or duct sealant to keep airflow strong.
Check the outside vent cover for tight fit. Make sure the flap opens easily and closes fully. Replace weatherstripping if it looks worn or damaged. Proper sealing stops outside air and pests from entering your home.

Credit: www.create-enjoy.com
Maintenance Tips
Keeping your range hood vented through a side wall in top shape is essential for its efficiency and your kitchen’s air quality. Regular maintenance saves you from costly repairs and ensures your cooking space stays fresh and smoke-free.
Cleaning The Vent And Filters
Grease and dust build up quickly in your range hood vent and filters. Cleaning them regularly prevents blockages and maintains good airflow.
Remove the filters and soak them in hot, soapy water. Use a soft brush to scrub away stubborn grease. Let them dry completely before reinstalling.
Don’t forget to check the vent on the side wall itself. Wipe down the exterior vent cover and clear any debris or nests that might be blocking it.
Inspecting For Damage
Look over the entire venting system often for cracks, rust, or loose connections. Even small damage can reduce performance and cause leaks.
Check the vent pipe inside the wall for holes or dents. If you spot issues, replace or repair the damaged sections immediately.
Have you noticed unusual noises or a drop in suction power? These could be signs that something isn’t quite right with your venting system and needs attention.

Credit: www.create-enjoy.com
Frequently Asked Questions
How Do You Vent A Range Hood Through A Side Wall?
To vent a range hood through a side wall, install a duct that runs horizontally from the hood to the exterior. Use a wall cap with a damper to prevent backdrafts. Ensure the duct is straight and sealed for maximum airflow and efficiency.
What Materials Are Best For Side Wall Venting Ducts?
Rigid metal ducts, preferably aluminum or galvanized steel, are best for side wall venting. They resist grease buildup, offer durability, and maintain airflow. Avoid flexible plastic or foil ducts as they reduce efficiency and increase fire risk.
How High Should A Side Wall Vent Be Installed?
Install the side wall vent at least 10 feet above ground level. This height prevents obstruction by shrubs or snow and ensures proper air dispersion. Also, position the vent away from windows or doors to avoid fumes entering your home.
Can I Vent My Range Hood Through An Exterior Brick Wall?
Yes, you can vent through an exterior brick wall. Use a core drill to create a hole, then install the duct and wall cap. Proper sealing around the duct prevents leaks and maintains energy efficiency.
Conclusion
Venting a range hood through a side wall keeps your kitchen fresh and safe. Proper planning and correct tools make the job easier. Always measure and cut carefully to avoid mistakes. Seal all gaps to prevent air leaks and pests.
Check local codes to stay compliant and safe. With patience, you can complete this project well. Enjoy better air quality and a cleaner kitchen space. Small steps lead to great results. Simple, clear, and effective venting works every time.