
Are your car headlights looking dull or cloudy? This can make driving at night harder and less safe.
But don’t worry—you can fix this yourself with simple steps. Knowing how to wash car headlights properly will brighten your lights and improve your visibility on the road. Keep reading, and you’ll discover easy tips that save you time and money while making your car look like new again.
Tools And Materials Needed
Cleaning car headlights improves visibility and safety. Using the right tools makes the job easier.
This guide lists common items and special products to clean headlights well.
Common Household Items
You can clean headlights using items found at home. These are simple and cost-effective.
- Soap or dish detergent
- Water
- Old toothbrush or soft cloth
- Baking soda
- White vinegar
- Toothpaste (non-gel)
- Masking tape
Specialized Cleaning Products
Special products help remove tough grime and restore headlight clarity. They work faster than home items.
- Headlight restoration kits
- Plastic polish or rubbing compound
- Microfiber towels
- Spray sealant for protection
Protective Gear
Wear safety gear to protect your eyes and skin during cleaning. Some cleaners can irritate.
- Rubber or latex gloves
- Safety glasses or goggles
- Mask to avoid inhaling dust

Credit: www.carsales.com.au
Preparing Your Car
Cleaning your car headlights starts with the right preparation. Taking time to prepare ensures a better cleaning result.
This section covers important steps before you begin washing your headlights.
Park In A Shaded Area
Always park your car in a shaded spot. Direct sunlight can dry cleaning products too fast. This may leave streaks or spots on your headlights.
Clean The Headlight Surface
Remove dirt and grime from the headlights before washing. Use water and a soft cloth to wipe the surface gently.
- Rinse headlights with clean water
- Use mild soap if needed
- Wipe with a microfiber cloth
- Dry the surface completely
Gather Your Supplies
| Supply | Purpose |
| Microfiber Cloth | Cleaning and drying headlights |
| Mild Soap | Removing dirt and grease |
| Water | Rinsing and washing |
| Plastic Bucket | Holding water and soap mixture |
Step-by-step Cleaning Process
Cleaning car headlights improves visibility and makes your car look better. This guide shows simple steps to clean headlights safely.
Follow each step carefully to remove dirt, oxidation, and restore shine. You will also learn how to protect your headlights after cleaning.
Initial Wash
Start by washing the headlights with soap and water. This removes dirt and dust from the surface.
Use a soft cloth or sponge to avoid scratching the plastic lens.
- Mix car soap with water in a bucket
- Dip a soft cloth or sponge into the soapy water
- Gently clean the headlight surface
- Rinse with clean water
- Dry the headlights with a microfiber towel
Removing Oxidation
Oxidation causes headlights to look cloudy or yellow. You can remove it using a headlight restoration kit or household items like baking soda.
Rub the oxidized area gently to avoid damage to the lens.
- Apply a small amount of baking soda paste or restoration compound
- Use a soft cloth or foam pad to rub in circular motions
- Keep rubbing until the cloudiness fades
- Rinse off the residue with water
- Dry the surface completely
Polishing The Headlights
Polishing smooths the headlight surface and improves clarity. Use a plastic polish or car polish for best results.
Work in small sections and remove any excess polish after application.
- Apply polish to a clean cloth or applicator pad
- Rub the polish onto the headlight in small circles
- Buff the headlight with a microfiber towel
- Repeat if needed for a clearer finish
Applying A Protective Sealant
Sealants protect headlights from dirt and UV rays. This helps keep them clear longer.
Choose a sealant made for plastic headlights and follow the instructions on the label.
- Clean the headlight surface before applying sealant
- Apply a thin, even layer of sealant using a cloth
- Let it dry as instructed on the product
- Apply a second coat if needed for extra protection
Diy Vs Commercial Headlight Restoration Kits
Headlights often get cloudy and dirty over time. Cleaning them improves your car’s look and safety.
You can clean headlights yourself or use a restoration kit. Both have good and bad points.
Pros And Cons Of Diy Methods
DIY methods use common household items like toothpaste or baking soda. These are easy and cheap.
DIY cleaning can work for light cloudiness but may not last long. It needs more effort and time.
- Pros:Low cost, easy to find materials, no special tools needed
- Cons:May not remove deep yellowing, results vary, can take longer
Benefits Of Restoration Kits
Restoration kits come with special compounds and tools made for headlights. They clean better and last longer.
Kits often include sandpaper, polish, and sealant. These parts work together to clear and protect headlights.
- Better cleaning power for tough stains and yellowing
- Longer lasting protection from sun and dirt
- Clear instructions make the process easier
Maintenance Tips For Long-lasting Shine
Car headlights often get dirty and dull. Keeping them clean helps you drive safely at night. It also makes your car look better.
Simple care steps keep headlights bright for a long time. Follow these tips to maintain a clear shine.
Regular Cleaning Schedule
Clean your headlights every two weeks. Dirt and grime build up fast on the road. Regular cleaning stops buildup before it gets hard to remove.
Use water and mild soap to wash headlights. Rinse well to remove all dirt. Dry with a soft cloth to avoid scratches.
- Check headlights every two weeks
- Wash with soap and water
- Dry with a clean, soft cloth
Avoiding Harsh Chemicals
Do not use strong cleaners on headlights. Harsh chemicals can damage the plastic lens. This causes cloudiness and cracks.
Choose gentle cleaning products made for cars. Avoid bleach, ammonia, and abrasive pads. These harm the headlight surface.
- Skip bleach and ammonia cleaners
- Use car-safe mild soap or cleaner
- Do not scrub with rough materials
Protecting Against Uv Damage
Sunlight causes headlights to yellow and fade. UV rays break down the plastic lens over time. Protect your headlights to keep them clear.
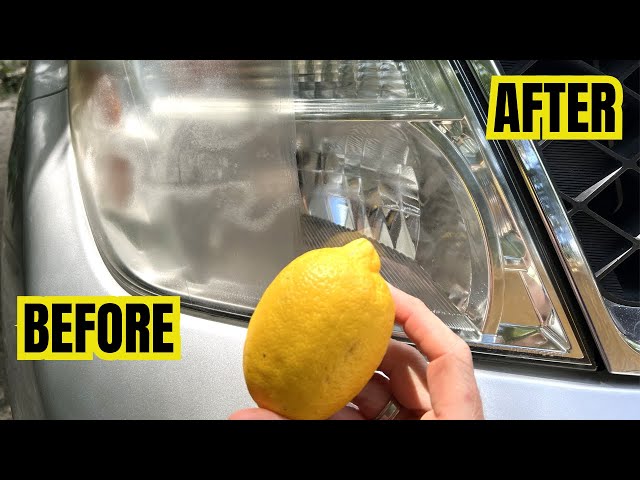
Apply a UV protectant after cleaning. It forms a shield against sun damage. Park in shade or garage when possible to reduce exposure.
- Use UV protectant sprays or wipes
- Park in shaded areas or garage
- Reapply protectant every few months
Credit: www.youtube.com
Troubleshooting Common Issues
Cleaning car headlights can improve your night driving safety. Sometimes, washing is not enough to fix all problems. Some issues need extra care or different methods.
This guide covers common problems like cloudiness, scratches, and when to ask for expert help.
Persistent Cloudiness
Cloudy headlights reduce light output and visibility. Regular washing may not remove this haze completely. The cloudiness often happens from sun damage or oxidation.
- Use a headlight restoration kit for better results.
- Apply a UV sealant after cleaning to prevent return.
- Try mild sanding with very fine grit if kits fail.
- Avoid harsh chemicals that can worsen the damage.
Scratches And Surface Damage
Scratches on headlights reduce clarity and look bad. They can happen from dirt, brushes, or car washes. Some scratches are shallow, but others go deep.
| Scratch Type | How to Fix |
|---|---|
| Light Surface Scratches | Use polishing compound and microfiber cloth |
| Medium Scratches | Wet sanding followed by polishing |
| Deep Scratches | Consider headlight replacement or professional repair |
When To Seek Professional Help
Some headlight issues need expert care to fix safely. If damage is deep or persistent, ask a professional. They have tools and products for best results.
- If headlights stay cloudy after cleaning
- If scratches are too deep to fix at home
- If there is moisture inside the headlight lens
- If electrical problems affect headlight function

Credit: www.whocanfixmycar.com
Frequently Asked Questions
How Often Should I Wash Car Headlights?
Wash car headlights every 1-2 months to maintain clarity. Regular cleaning removes dirt and grime that reduce brightness. Frequent washing ensures better visibility and safer driving, especially at night or in bad weather conditions.
What Materials Do I Need To Wash Headlights?
You need mild soap, water, microfiber cloth, and optionally toothpaste or a headlight cleaner. Avoid harsh chemicals that can damage the lens. Soft materials prevent scratches and help achieve a clear, polished finish.
Can I Use Toothpaste To Clean Headlights?
Yes, toothpaste works as a mild abrasive to remove oxidation. Apply a small amount, rub gently with a cloth, then rinse. It’s an affordable and effective method for lightly foggy headlights.
Should I Apply A Protective Coating After Washing?
Applying a UV sealant after cleaning protects headlights from future yellowing. It extends clarity and reduces damage from sun exposure. This step helps maintain brightness and prolongs the cleaning effect.
Conclusion
Keeping your car headlights clean helps you see better at night. Dirt and grime reduce light and make driving unsafe. Regular washing keeps headlights clear and bright. Use gentle cleaners and soft cloths for best results. Avoid harsh chemicals that can damage plastic covers.
Clean headlights improve your car’s look and safety. Try washing them every few weeks to stay safe on the road. Clear headlights mean safer drives and better visibility. Simple care can make a big difference.