Installing a range hood vent in your kitchen might seem daunting, but it’s easier than you think. Imagine cooking without worrying about lingering odors or smoke.
A range hood vent can transform your kitchen, making it more pleasant and functional. This guide will walk you through the installation process, step by step, so you can tackle the task with confidence. You’ll learn how to choose the right tools, prepare your space, and complete the installation without a hitch.
Ready to enhance your kitchen and improve your cooking experience? Let’s get started!
Choosing The Right Range Hood
Choosing the right range hood is crucial for maintaining a clean and comfortable kitchen environment. The right hood not only removes smoke and odors effectively but also complements your kitchen’s design and size. Before you pick one, consider your cooking habits, kitchen layout, and ventilation needs carefully.
Types Of Range Hoods
Range hoods come in several styles, each suited for different kitchen setups and preferences. The most common types include:
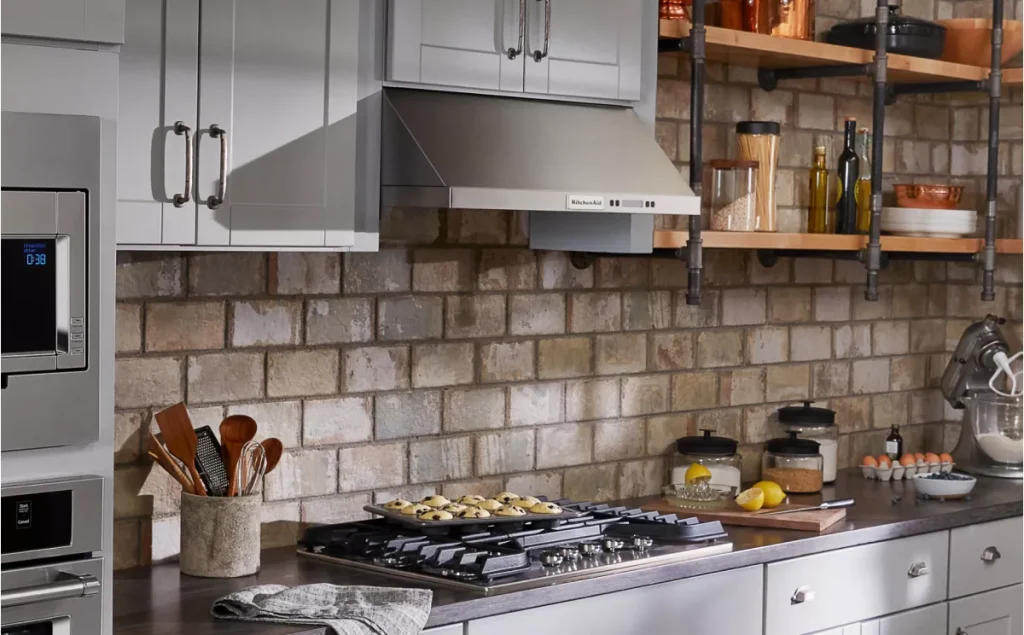
- Under-cabinet hoods:Mounted beneath kitchen cabinets, these are great for saving space and are easy to install.
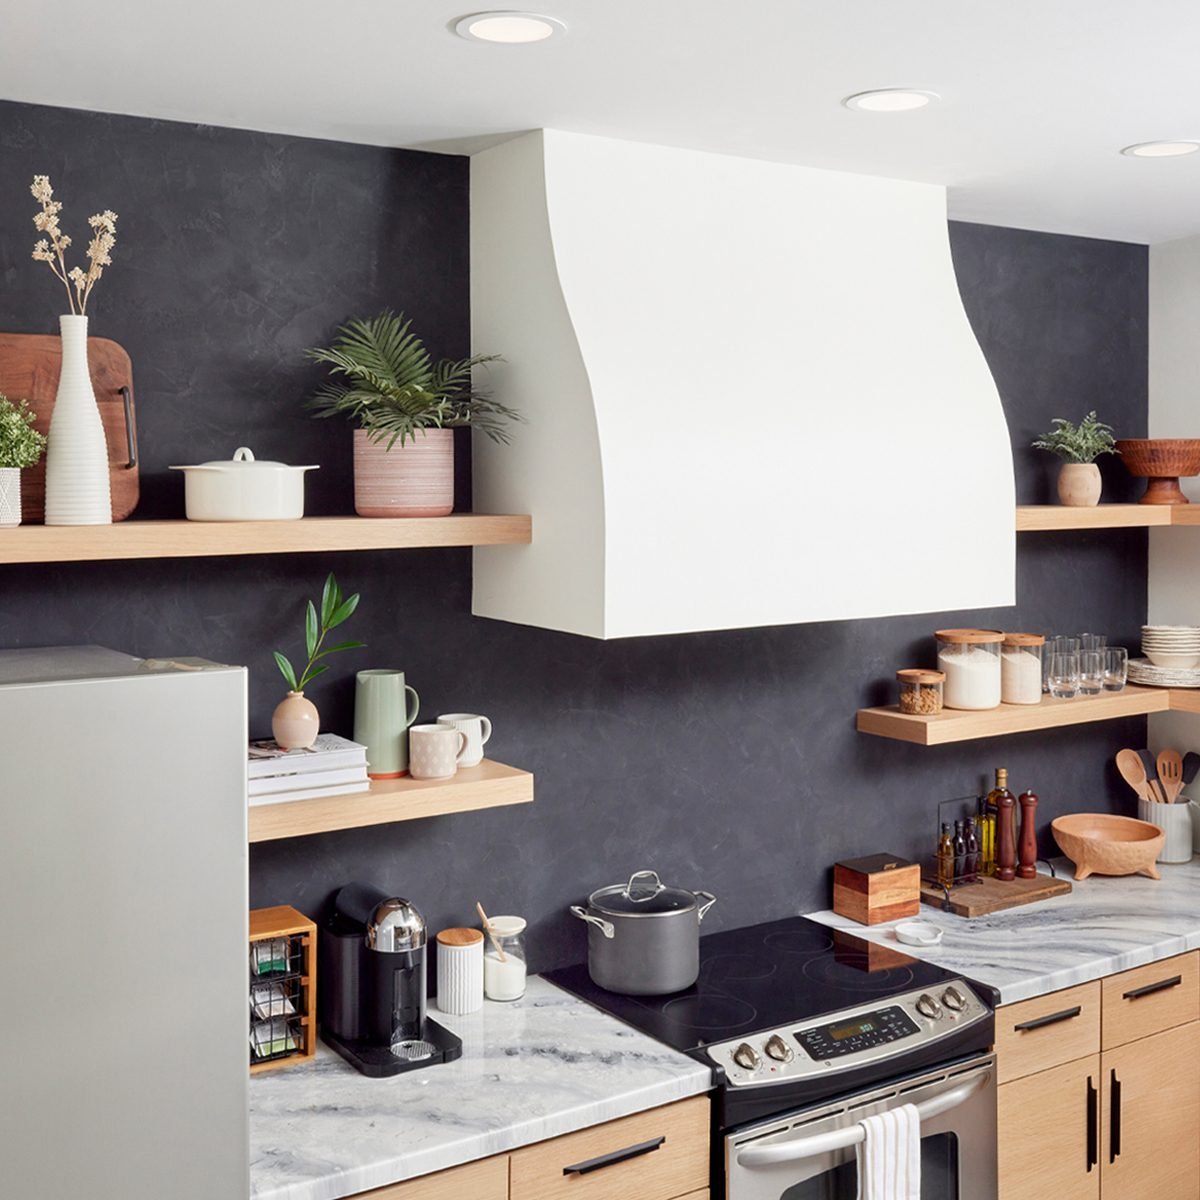
- Wall-mounted hoods:Attached to the wall above the stove, they often become a focal point of the kitchen design.
- Island hoods:Suspended from the ceiling over an island cooktop, perfect for open-concept kitchens.
- Downdraft hoods:Installed behind the cooktop and rise when needed, ideal for kitchens with limited overhead space.
Which type fits your kitchen’s layout and style best? Think about where your stove is and how you want the hood to blend or stand out.
Measuring Your Kitchen Space
Accurate measurements ensure your range hood fits perfectly and functions well. Measure the width of your stove or cooktop first; the hood should be at least as wide to capture all cooking fumes.
Next, check the height from your cooktop to the ceiling or cabinets. Most manufacturers recommend a distance of 24 to 30 inches for optimal performance and safety. Don’t forget to allow enough clearance so the hood doesn’t interfere with your cooking space.
Have you measured your space yet? This step prevents costly mistakes and ensures smooth installation.
Matching Ventilation Capacity
Ventilation capacity is measured in cubic feet per minute (CFM) and indicates how much air the hood can move. Cooking styles affect how much ventilation you need; heavy frying or grilling requires higher CFM.
A good rule of thumb is to have at least 100 CFM for every 10,000 BTUs of your stove’s power. For example, a 40,000 BTU stove needs a hood with a minimum of 400 CFM.
Don’t underestimate this aspect—too little ventilation means lingering smells and smoke, while too much can create unnecessary noise and energy use. What’s your cooking style telling you about the power your hood needs?
Credit: www.familyhandyman.com
Gathering Tools And Materials
Before installing a range hood vent, gather all necessary tools and materials. Preparation saves time and avoids interruptions. Having the right items ready makes the installation smoother and safer. Organize everything in one place to work efficiently.
Essential Tools Needed
- Power drill with drill bits
- Screwdrivers (Phillips and flathead)
- Measuring tape
- Level
- Pencil or marker for marking
- Stud finder
- Jigsaw or hole saw for duct cutting
- Wire stripper
- Utility knife
- Adjustable wrench
Materials For Installation
- Range hood unit
- Vent duct pipe (metal preferred)
- Duct tape or foil tape
- Wall anchors and screws
- Electrical wire connectors
- Caulking or sealant
- Vent cap or exterior vent cover
- Mounting bracket (if not included)
Safety Gear Checklist
- Safety glasses to protect eyes
- Work gloves to protect hands
- Dust mask to avoid inhaling dust
- Ear protection for loud tools
- Non-slip shoes for stable footing
Preparing The Installation Area
Preparing the installation area is an important first step before fitting a range hood vent. This stage ensures a smooth and safe installation process. Proper preparation helps avoid future problems and saves time.
Locating Existing Vents
Check your kitchen for any current ventilation openings. Use a flashlight to see inside cabinets or walls. Identify where the vent pipe connects to the outside. Confirm the vent size matches your new range hood. This step helps avoid extra cutting or adjustments later.
Marking Mounting Points
Measure the range hood dimensions carefully. Use a pencil to mark where the screws will go on the wall. Double-check the marks are level and aligned. Mark the height according to the manufacturer’s instructions. Accurate marks make the installation easier and more secure.
Clearing The Workspace
Remove all items from the cooking area and nearby surfaces. Clean the wall and counters to ensure a dust-free zone. Clear enough space to move and use tools safely. A tidy workspace reduces the risk of accidents or damage.
Installing The Vent Duct
Installing the vent duct is a crucial part of setting up your range hood properly. This step ensures that smoke, odors, and heat are effectively drawn out of your kitchen. The vent duct’s placement and connection directly affect your kitchen’s ventilation efficiency and overall safety.
Choosing The Vent Path
Deciding where your vent duct will run requires careful thought. Look for the shortest and straightest path to the outside to maximize airflow. Avoid long duct runs with multiple bends, as these reduce the vent hood’s efficiency.
Consider the type of exterior wall or roof you’ll vent through. Can you access the outside easily? Also, check local building codes to ensure your vent route complies with regulations. Have you checked if there’s enough clearance around the duct path for insulation or other barriers?
Cutting The Vent Hole
Mark the exact spot where the vent will exit your home. Use a stud finder to avoid cutting into wires or pipes hidden behind walls. Precision here prevents future repairs and safety hazards.
Use a drill to create a starter hole, then cut the outline with a jigsaw or reciprocating saw. Wear safety goggles and gloves to protect yourself from debris. Keep the hole size slightly larger than the duct diameter to allow for easy fitting and sealing.
Connecting The Ductwork
Fit the duct pieces together, ensuring tight, secure connections to prevent air leaks. Use metal foil tape—not duct tape—to seal joints; it withstands heat and won’t deteriorate over time. Avoid using screws inside the duct as they can catch grease and reduce airflow.
Support the duct with brackets or straps to keep it stable and prevent sagging. Have you double-checked that the duct slopes slightly upward towards the exit? This prevents moisture buildup inside the duct, which can cause mold or damage.
Mounting The Range Hood
Mounting the range hood is a crucial part of the installation. It must be secure and aligned perfectly. Proper mounting ensures the hood works efficiently and lasts long. Careful attention to each step guarantees safety and functionality.
Securing The Hood To The Wall
Start by finding the wall studs using a stud finder. Mark the points where the hood will attach. Use a level to keep the hood straight. Drill pilot holes into the studs. Attach the mounting bracket with strong screws. Lift the range hood and hook it onto the bracket. Tighten all screws to hold the hood firmly in place.
Aligning The Vent Connection
Check the vent opening on the range hood and the wall or ceiling vent. Adjust the hood so the vent pipes line up. Use foil tape to seal any gaps between the pipes. Ensure the vent pipe is straight to allow smooth airflow. Avoid sharp bends in the ductwork. Secure the vent connection tightly to prevent leaks.
Testing Stability
Gently shake the range hood to test its stability. Make sure it does not wobble or move. Tighten screws if there is any looseness. Check that the hood stays level after tightening. Confirm the vent connection remains secure during testing. A stable hood means safe and effective operation.

Credit: www.create-enjoy.com
Electrical Connections
Electrical connections are a crucial part of installing your range hood vent. Without proper wiring, your hood won’t function safely or efficiently. Understanding the power options and wiring process can save you time and avoid costly mistakes.
Power Supply Options
Your range hood needs a reliable power source, typically either a direct hardwired connection or a plug-in outlet. Hardwiring is common for built-in models and offers a cleaner look since there’s no visible cord. On the other hand, plug-in options are easier to install and useful if you want flexibility or plan to move the unit later.
Check your local electrical code and the range hood’s manual to see which option fits your setup. Have you measured where your electrical box will be relative to the hood? Ensuring the power source is nearby can prevent unnecessary drilling or rewiring.
Wiring The Range Hood
Before starting any wiring, turn off the power at your circuit breaker to avoid shocks. Most range hoods come with a wiring diagram—follow it carefully. Connect the black (live) wire from the hood to the black supply wire, the white (neutral) wire to the white supply wire, and the green or bare copper wire to ground.
If you’re not confident working with electrical components, consider hiring a professional. Remember, incorrect wiring can cause shorts or even fires. Using wire nuts and electrical tape to secure connections adds an extra layer of safety.
Testing Electrical Functionality
Once your wiring is complete, restore power and test the hood’s functions. Turn on the fan and lights to ensure everything operates smoothly without flickering or unusual noises. If something feels off, double-check your connections or consult an electrician.
Did you know that some models have a reset button or fuse inside? It’s worth inspecting if your hood doesn’t power on immediately. Testing early saves frustration later and guarantees your kitchen stays smoke-free and well-lit.
Final Adjustments And Testing
After installing your range hood vent, the final adjustments and testing phase ensures everything works smoothly. This step helps you catch any issues early and maximize the vent’s performance. Small tweaks can make a big difference in your kitchen’s air quality and comfort.
Checking Airflow Efficiency
Start by turning on the range hood and observing how well it pulls air. You can test airflow efficiency by holding a piece of lightweight paper or tissue near the vent intake; it should be drawn in firmly. If the suction feels weak, inspect the duct connections for leaks or blockages.
Measuring airflow with an anemometer gives precise results, but simple tests often reveal if something’s off. Good airflow means your cooking smells and smoke won’t linger in the kitchen.
Adjusting Fan Speeds
Most range hoods come with multiple fan speeds to match different cooking needs. Try each speed setting to see which works best for your usual cooking style. High speeds are great for frying or grilling, while low speeds handle simmering or light cooking.
If the fan speeds don’t change smoothly or the motor sounds strained, double-check your wiring and fan assembly. Adjustments here improve energy use and extend your vent’s lifespan.
Ensuring Noise Levels Are Low
Noise can be a deal-breaker for many people. After installing, listen carefully to the vent running on various speeds. A well-installed range hood should operate quietly without rattles or buzzes.
If you notice excessive noise, check for loose screws, unbalanced fan blades, or vibration against cabinets. Adding rubber gaskets or insulation around mounting points often reduces sound dramatically.
Have you noticed how much quieter your kitchen feels with a properly adjusted vent? That peaceful background hum means your range hood is doing its job right.
Maintenance Tips
Proper maintenance keeps your range hood vent working well. Regular care helps it last longer and perform better. Small tasks can prevent big problems and costly repairs. Follow these simple tips to maintain your range hood vent effectively.
Cleaning Filters Regularly
Filters trap grease and dirt from cooking fumes. Clean them every 1 to 3 months. Soak filters in hot, soapy water. Use a soft brush to remove stuck grease. Rinse filters well and let them dry before putting back. Some filters are dishwasher safe; check your manual.
Inspecting Ductwork
Check ductwork for leaks or blockages twice a year. Look for loose connections or damaged parts. Clean dust or grease buildup inside ducts to improve airflow. Use a flashlight to see inside ducts clearly. Seal any gaps with foil tape, not regular tape.
Troubleshooting Common Issues
Noise or weak suction are common problems. Clean or replace filters if the hood is noisy. Check the fan blades for dirt or damage. Make sure the power source is working correctly. If the light doesn’t work, replace the bulb with the right type.

Credit: www.reddit.com
Frequently Asked Questions
What Tools Are Needed To Install A Range Hood Vent?
You need a drill, screwdriver, measuring tape, level, wire stripper, and duct tape. Safety gear is also important. These tools ensure a smooth and safe installation process.
How Do I Choose The Right Vent For My Range Hood?
Pick a vent size matching your hood’s specifications. Consider duct type and length for optimal airflow. Proper sizing improves ventilation and efficiency.
Can I Install A Range Hood Vent Myself?
Yes, DIY installation is possible with basic tools and skills. Follow manufacturer instructions carefully. If unsure, consult a professional to ensure safety and proper setup.
How Far Should The Range Hood Be From The Cooktop?
Install the hood 24 to 30 inches above the cooktop. This distance ensures effective smoke and odor removal without obstructing cooking.
Conclusion
Installing a range hood vent helps keep your kitchen fresh and clean. Follow the steps carefully to ensure a safe setup. Proper ventilation removes smoke, odors, and moisture efficiently. Take your time measuring and fitting each part correctly. A well-installed vent improves air quality and cooking comfort.
With patience and care, anyone can complete this task. Enjoy a healthier kitchen environment every day.