Are you curious about the inner workings of your vintage audio equipment or perhaps your old guitar amplifier? If you’re looking to revive that rich, warm sound, understanding how to test vacuum tubes is essential.
These glowing components, though small, are the heart of many classic devices. However, determining if they’re performing at their best can seem daunting. Fear not! This guide is here to demystify the process for you. By the end, you’ll not only know how to test vacuum tubes but also feel confident in ensuring your gear runs smoothly.
Dive in to discover how a simple test can enhance your listening experience and prolong the life of your cherished devices. Ready to unlock the secrets behind those mesmerizing glows? Let’s get started!
Tools Needed
Testing vacuum tubes requires specific tools to get accurate and reliable results. Having the right equipment not only saves time but also protects your tubes from damage. Let’s explore the essential tools you need to confidently test vacuum tubes at home or in your workshop.
Types Of Tube Testers
Tube testers come in different forms, each suited for various testing needs. Basic tube testers check for simple functionality, while advanced models measure parameters like emission and mutual conductance.
- Analog Tube Testers:Use needle gauges to show tube health. They are great for quick checks but may lack precision.
- Digital Tube Testers:Provide detailed numeric readings and often include multiple test modes. These are excellent if you want more exact data.
- Mutual Conductance Testers:Offer in-depth performance analysis, ideal for audiophiles and professionals.
Choosing the right type depends on your experience level and how thorough you want your testing to be.
Multimeter Use
A multimeter is a versatile tool that can assist in vacuum tube testing. While it doesn’t test tubes directly, it helps check the tube socket pins and circuit continuity.
- Use the resistance setting to test filament continuity.
- Check for shorts or open circuits in the tube pins.
- Measure voltage levels in the tube’s operating circuit to ensure proper conditions.
I once saved a vintage amplifier by spotting a broken filament connection with my multimeter, proving its value beyond just tube testing.
Additional Equipment
Besides testers and multimeters, other tools enhance your testing process. A good tube socket adapter can accommodate different tube types without swapping hardware.
- Tube Socket Adapters:Make testing multiple tube types easier and faster.
- Cleaning Supplies:Use contact cleaner and brushes to ensure clean tube pins and sockets.
- Power Supplies:Adjustable DC power supplies help simulate operating conditions safely.
Have you ever struggled with poor contact during testing? A quick cleaning often fixes the issue, saving you from confusing false readings.

Credit: shaunmerrigan.info
Preparing Tubes For Testing
Preparing vacuum tubes before testing is crucial for accurate results. Dirt, dust, and damage can affect tube performance. Taking time to prepare tubes ensures a smoother testing process and reliable readings.
Cleaning Tube Pins
Tube pins must be clean for good electrical contact. Use a soft cloth or fine sandpaper to remove dirt and oxidation. Avoid using harsh chemicals that can damage the pins. Gently rub each pin until it looks shiny and free of debris. Clean pins reduce resistance and improve test accuracy.
Visual Inspection Tips
Look closely at the tube glass and pins for cracks or damage. Check for any discoloration or burnt spots inside the tube. Examine the pins for bending or corrosion. Use a bright light to see inside clearly. A damaged tube may give false test results or fail completely.
Safety Precautions
Vacuum tubes can get hot during use. Always handle tubes with care to avoid burns. Make sure the tester is off before inserting or removing tubes. Work in a well-lit, dry area to prevent accidents. Never touch tube pins with wet hands. Follow these steps to keep yourself safe while testing tubes.
Basic Testing Methods
Testing vacuum tubes ensures they function correctly in audio or electronic devices. Basic testing methods help identify if a tube is working or faulty. These tests check different tube parts and their performance. Simple tools often perform these tests safely and effectively.
Filament Continuity Check
The filament heats the tube’s internal parts. A broken filament means the tube won’t work. Use a multimeter set to measure resistance. Touch the meter leads to the filament pins. A low resistance reading shows the filament is intact. No reading or infinite resistance means a broken filament.
Emission Testing
Emission testing checks if the tube produces electrons properly. It shows if the tube can amplify signals. Specialized tube testers apply voltage and measure current flow inside the tube. A strong emission means the tube is healthy. Weak or no emission signals a worn-out or faulty tube.
Mutual Conductance Measurement
Mutual conductance measures the tube’s gain ability. It compares changes in current to changes in voltage. This test requires a tube tester with mutual conductance settings. High mutual conductance indicates good tube amplification. Low values suggest a tube is weak or damaged.

Credit: shaunmerrigan.info
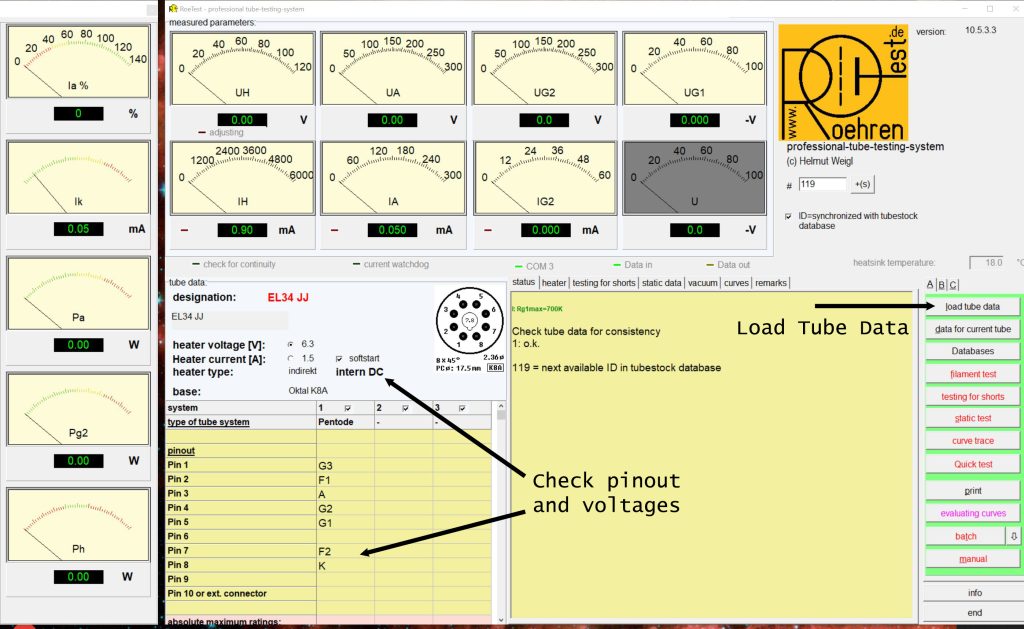
Using A Tube Tester
Using a tube tester is one of the most reliable ways to check the condition of your vacuum tubes. It provides detailed insights into the tube’s performance, helping you decide if it’s still good or needs replacement. Let’s walk through how to set up the tester, read the results, and understand what the indicators mean for your tubes.
Setting Up The Tester
Start by identifying the tube type you want to test. Most testers have a chart or manual that shows the correct socket and settings for each tube model. Plug the tube into the appropriate socket carefully, ensuring it fits snugly without forcing it.
Next, adjust the tester’s dials or switches according to the tube’s specifications. This usually involves setting the filament voltage and test mode. Don’t rush this step; incorrect settings can give false readings or even damage the tube.
Reading Test Results
Once the tube is properly seated and the settings are correct, power on the tester. Watch the meter needle or digital display as the test runs. The reading usually falls on a scale indicating the tube’s emission or gain level.
Some testers show a simple pass/fail indicator, while others provide a percentage of the tube’s strength compared to a new one. Take note of any unusual sounds or flickering inside the tube—it often signals internal issues not captured by the meter.
Interpreting Different Indicators
Understanding what the tester’s indicators mean is crucial. A needle that swings into the green zone typically means your tube is functioning well. If it barely moves or stays in the red, the tube is weak or faulty.
Some testers also check for shorts or gas leaks, which appear as separate warning lights or symbols. If your tester shows these warnings, it’s a sign the tube is unsafe to use, even if the emission reading looks okay.
Have you noticed how some tubes pass the emission test but still perform poorly in your equipment? This happens because the tester can’t reveal every internal flaw. Always combine tester results with real-world listening or usage tests for best results.
Testing Without A Tube Tester
Testing vacuum tubes without a dedicated tube tester is entirely possible and can save you time and money. You just need some basic tools and a bit of patience. Knowing how to use these simple methods will help you quickly check if a tube is working or needs replacing.
Using A Multimeter
A multimeter can tell you a lot about a vacuum tube’s condition. Start by setting your multimeter to the resistance (ohms) mode.
- Check the filament pins for continuity. If the filament is broken, the multimeter will show infinite resistance.
- Measure resistance between other pins to spot shorts. A very low resistance where there shouldn’t be any indicates a problem.
Remember, this method doesn’t test the tube’s full functionality but gives you a quick pass/fail on basic faults.
Simple Circuit Testing
You can test a tube by inserting it into a working device or a simple test circuit. This approach lets you observe if the tube powers up and amplifies signals as expected.
- Use a known good amplifier or radio that uses the same tube type.
- Listen for signs of distortion, hum, or no sound at all—these are clues about the tube’s health.
- Alternatively, build a simple test circuit with a few resistors and a power supply to light the filament and check for basic operation.
This hands-on method shows real-world performance, which is often more useful than just electrical readings.
Recognizing Common Faults
Knowing what faults to look for helps you decide if a tube is repairable or should be replaced. Here are some common issues:
| Fault | Symptom | What to Do |
|---|---|---|
| Open Filament | No glow when powered | Replace the tube |
| Gas in Tube | Humming or buzzing sounds | Try baking the tube or replace it |
| Microphonics | Tube picks up vibrations | Replace tube for stable sound |
Have you noticed unusual noises or no light from your tube? These signs tell you exactly what to check next.
Advanced Testing Techniques
Advanced testing techniques help you uncover issues that basic checks might miss. They offer deeper insights into how your vacuum tubes perform under real conditions. These methods require more tools and attention but can save you from costly mistakes and improve your audio or electronic gear’s reliability.
Dynamic Testing
Dynamic testing measures how a vacuum tube behaves while it’s operating, not just at rest. You apply varying signals and monitor the tube’s response in real time. This reveals problems like microphonics or instability that static tests often overlook.
For example, if you hear unexpected noise or distortion during playback, dynamic testing can help pinpoint if the tube is the culprit. You’ll need an oscilloscope and a signal generator for this, but the insight is worth it. Have you noticed odd sounds in your equipment that disappear after replacing a tube? This test explains why.
Load Testing
Load testing puts the vacuum tube under the actual electrical stress it faces during use. Instead of testing the tube alone, you simulate the load from the circuit it belongs to. This method shows how the tube handles current flow and heat buildup.
By running a tube through a load test, you can detect weak tubes that might pass idle tests but fail under pressure. It’s like checking a car’s performance on the road instead of just looking under the hood. Do your tubes keep stable voltage and current during heavy use? Load testing answers that question.
Comparative Analysis
Comparative analysis involves testing multiple tubes of the same type side by side. This technique helps you spot subtle differences in performance and quality. You can compare gain, noise, and distortion levels to find the best tube for your setup.
Sometimes tubes with the same model number vary significantly, especially if they come from different batches or manufacturers. Comparing tubes helps you choose the one that delivers consistent sound and longer life. Have you ever swapped tubes and noticed unexpected changes? This approach reveals why some tubes perform better than others.
Maintaining And Storing Tubes
Maintaining and storing vacuum tubes properly is key to ensuring they perform well and last longer. Neglecting these aspects can lead to damage or reduced functionality, which can be frustrating when you’re relying on vintage audio gear or specialized electronics. Taking a few careful steps in handling and storage can save you time and money down the road.
Proper Handling
Handle vacuum tubes with clean, dry hands or use gloves to avoid transferring oils and dirt. These contaminants can cause hot spots when the tube heats up, potentially shortening its life.
Always hold tubes by the base and avoid touching the glass envelope directly. This minimizes the risk of accidental breakage and prevents contamination of the glass surface.
Have you noticed how a simple drop can ruin an expensive tube? Treat them gently and avoid sudden impacts or excessive force when inserting or removing tubes.
Storage Conditions
Store vacuum tubes in a cool, dry place away from direct sunlight to prevent heat damage and moisture buildup. High humidity can cause corrosion on the pins and internal components.
Use original packaging or padded containers to protect tubes from vibrations and shocks during storage or transport. Label your tubes clearly to avoid confusion and mishandling.
Consider keeping silica gel packets nearby to absorb any residual moisture. Do you check your storage environment regularly to maintain ideal conditions?
Extending Tube Life
Keep your tubes running within their recommended voltage and current limits to avoid excessive stress. Overdriving tubes can lead to early failure.
Regularly test your tubes using a tube tester or multimeter to catch signs of wear before they cause problems. Replacing tubes proactively can prevent unexpected equipment downtime.
Powering equipment on and off gently instead of abruptly can also reduce thermal shock. Have you tried monitoring your tubes’ performance over time to detect gradual changes?

Credit: www.remusic.it
Frequently Asked Questions
How Do You Test Vacuum Tubes Safely?
To test vacuum tubes safely, use a tube tester or multimeter with proper settings. Handle tubes gently and avoid touching pins. Ensure the device is powered off before insertion. Work in a well-ventilated area and avoid excessive heat to prevent damage and injury.
What Tools Are Needed To Test Vacuum Tubes?
Essential tools include a vacuum tube tester, multimeter, and a socket adapter. A tube tester measures emission, shorts, and gas leaks. A multimeter checks filament continuity. These tools help diagnose tube health quickly and accurately for effective maintenance.
How Can You Identify A Bad Vacuum Tube?
A bad vacuum tube shows weak emission or shorts on a tester. Signs include no glow, crackling sounds, or intermittent operation. Visual inspection may reveal discoloration or broken elements. Confirm results with a tube tester to ensure accurate identification.
Why Is Testing Vacuum Tubes Important?
Testing vacuum tubes ensures optimal performance and longevity of electronic devices. It helps detect faulty tubes early, preventing equipment damage. Regular testing maintains sound quality in audio gear and reliability in vintage electronics, saving repair costs.
Conclusion
Testing vacuum tubes helps keep your equipment working well. Use the right tools and follow clear steps. Check for signs of wear or damage often. This keeps your devices safe and reliable. Regular testing saves money and time later. Practice makes the process easier and faster.
Keep learning to spot problems early. Stay patient, and your tubes will last longer. Testing is simple with the right approach. Your gear deserves good care and attention.