
Your cutting board is more than just a kitchen tool—it’s a surface that needs care to stay safe and beautiful. If you want to protect your wood, prevent cracks, and keep it looking fresh, finishing your cutting board is a must.
But how do you do it right? In this guide, you’ll discover simple steps to finish your cutting board like a pro. By the end, you’ll know exactly how to bring out the best in your board, making it last longer and work better every time you cook.
Keep reading—you won’t want to miss these easy tips!
Choosing The Right Wood
Choosing the right wood is key to making a good cutting board. The wood you pick affects how the board looks and lasts over time.
Wood type changes how easy it is to clean and how well it holds up to knives and moisture.
Hardwoods Vs Softwoods
Hardwoods come from trees that lose leaves in fall. Softwoods come from trees with needles all year. Hardwoods are usually stronger and last longer.
- Hardwoods: maple, walnut, cherry
- Softwoods: pine, cedar, fir
- Hardwoods resist knife marks better
- Softwoods can dent and scratch easily
Grain Patterns And Durability
Grain patterns affect the look and strength of your board. Straight grain woods are easier to clean. Complex grains can hide marks and stains.
| Wood Type | Grain Pattern | Durability |
| Maple | Straight | High |
| Walnut | Wavy | High |
| Cherry | Straight to Curly | Medium |
| Pine | Straight | Low |
Sourcing Sustainable Materials
Pick wood that comes from forests where trees are grown and cut responsibly. This helps protect nature and keeps forests healthy.
- Look for FSC or PEFC certification
- Choose reclaimed or recycled wood
- Support local wood suppliers
- Avoid endangered wood species

Credit: www.amazon.com
Initial Sanding Techniques
Finishing a cutting board starts with sanding. Sanding smooths the wood and removes rough spots. Proper sanding sets the base for a lasting finish.
This guide covers key sanding methods to prepare your cutting board well. Focus on grit choice, sanding tools, and keeping the surface flat.
Selecting Grit Progression
Choosing the right sanding grit is important. Use coarse grit first to remove marks. Then use finer grits to smooth the surface.
- Start with 80 grit to remove rough areas.
- Move to 120 grit for a smoother finish.
- Finish with 220 grit to prepare for sealing.
Using Hand Sanding Vs Power Tools
Hand sanding gives you control and feels the surface better. Power tools speed up the work but may remove too much wood fast.
| Tool Type | Pros | Cons |
| Hand Sanding | More control, less risk | Time-consuming |
| Orbital Sander | Fast, even sanding | Can over-sand edges |
| Belt Sander | Removes rough spots quickly | Hard to keep flat |
Maintaining Flatness
Flatness keeps your cutting board safe and stable. Uneven sanding can cause dips or waves in the surface.
- Place the board on a flat surface before sanding.
- Sand in even strokes across the entire surface.
- Check flatness often using a straight edge or ruler.
- Focus on raised areas but avoid over-sanding low spots.
- Use a sanding block to keep pressure even.
Filling Cracks And Imperfections
Small cracks and dents can appear in cutting boards over time. Filling these imperfections helps keep the board smooth and safe for food use.
Using the right filler and techniques ensures a neat finish and prolongs the life of your cutting board.
Types Of Fillers
Different fillers work best depending on the size and type of crack or hole. Choose a filler that bonds well with wood and is food safe.
- Wood filler – ideal for small cracks and chips.
- Epoxy resin – good for larger gaps and deep cracks.
- Wood glue mixed with sawdust – makes a natural filler matching the wood color.
- Mineral oil mixed with fine sawdust – used for minor surface blemishes.
Application Tips
Clean the cracks before filling to remove dust and debris. This helps the filler stick better.
- Apply the filler with a putty knife or similar tool.
- Press the filler into the crack firmly to avoid air pockets.
- Fill slightly above the surface to allow for sanding.
- Let the filler set as per the product instructions.
Drying And Sanding After Filling
| Step | Details |
| Drying time | Wait at least 1 to 24 hours depending on filler type |
| Initial sanding | Use medium-grit sandpaper (120-150 grit) to level filler |
| Final sanding | Use fine-grit sandpaper (220 grit) for smooth finish |
| Cleaning | Remove dust with a damp cloth before oiling or finishing |
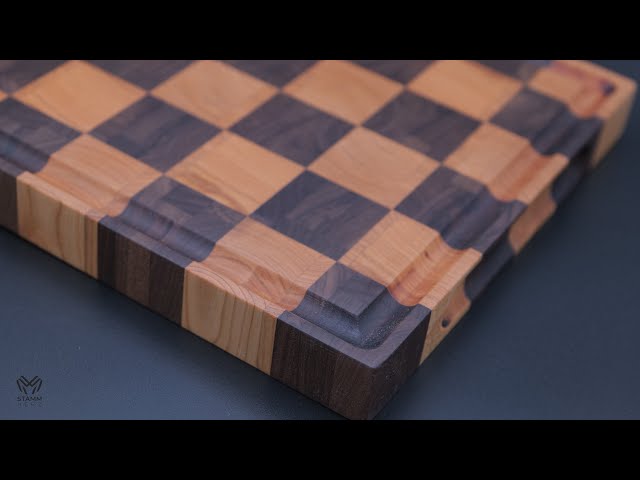
Credit: www.youtube.com
Sealing The Surface
Sealing your cutting board protects it from water and stains. It also keeps the wood safe from germs. Using the right sealer helps your board last longer and stay food-safe.
There are several ways to seal a cutting board. This guide covers food-safe sealers, the difference between oil and wax, and how to apply multiple coats properly.
Choosing Food-safe Sealers
Only use sealers that are safe for food contact. These sealers do not harm your health or change the taste of food.
- Mineral oil is popular and easy to find.
- Beeswax provides a natural finish and extra protection.
- Walnut oil is natural but may cause allergies.
- Coconut oil can go rancid, so use refined versions.
- Commercial food-safe finishes often combine oils and waxes.
Applying Oil Vs Wax
Oils soak into the wood and keep it from drying out. Wax sits on the surface and adds a smooth feel. Both help protect the board but work differently.
| Type | Benefits | Drawbacks |
|---|---|---|
| Oil | Penetrates wood, easy to apply, food-safe | Needs frequent reapplication |
| Wax | Creates water-resistant surface, smooth finish | Can wear off faster, needs buffing |
Multiple Coats And Drying Times
Applying several coats improves protection and appearance. You must allow each coat to dry well before adding the next.
- Clean the board before sealing.
- Apply the first coat of oil or wax with a soft cloth.
- Wait at least 4 to 6 hours for drying.
- Lightly sand the surface if rough.
- Apply a second coat and let it dry fully.
- Repeat until the wood feels smooth and sealed.
Buffing And Polishing
Buffing and polishing are key steps to finish a cutting board. These steps make the surface smooth and shiny. A smooth finish helps protect the wood and makes it safe for food use.
Proper tools and techniques can improve the look and lifespan of your cutting board. This guide explains the tools, how to get a smooth finish, and ways to keep the shine.
Tools For Buffing
Using the right tools helps you buff and polish your cutting board well. You need soft cloths and some polishing materials to start.
- Fine-grit sandpaper (320 to 400 grit)
- Soft cotton or microfiber cloths
- Buffing wheel or hand buffer
- Food-safe mineral oil or beeswax
- Polishing compound made for wood
Achieving A Smooth Finish
Start by sanding the board with fine sandpaper. This removes any rough spots. Then, use a soft cloth or buffing wheel to polish the surface gently.
- Sand the entire board evenly with 320-grit sandpaper.
- Wipe off dust with a damp cloth.
- Apply a small amount of polishing compound on the cloth or wheel.
- Buff the board in circular motions until smooth.
- Use a clean cloth to remove excess polish.
Maintaining The Shine
| Maintenance Task | Frequency | Details |
|---|---|---|
| Reapply Mineral Oil | Monthly | Rub food-safe mineral oil over the board to keep wood hydrated. |
| Buff with Soft Cloth | Weekly | Use a clean cloth to buff the surface and maintain shine. |
| Use Beeswax Polish | Every 3 Months | Apply beeswax polish for extra protection and shine. |

Credit: homewithgraceandjoy.com
Regular Maintenance Tips
Keeping your cutting board in good shape helps it last longer. Regular care stops cracks and stains.
Simple habits after each use make a big difference. Follow these tips to keep your board clean and safe.
Cleaning After Use
Wash the board with warm water and mild soap after each use. Avoid soaking it in water for a long time.
Dry the board with a clean towel and stand it upright to air dry. This stops moisture from building up inside.
Reapplying Oil And Wax
Apply food-safe mineral oil or beeswax regularly to protect the wood. It keeps the board from drying out and cracking.
- Clean the board well and dry it completely.
- Use a clean cloth to rub oil or wax into the surface.
- Let it soak in for a few hours or overnight.
- Wipe off any extra oil before using the board again.
Avoiding Common Damages
| Damage Type | How to Prevent |
|---|---|
| Deep Cuts | Use sharp knives and avoid heavy chopping in one spot. |
| Warping | Do not soak the board or put it in the dishwasher. |
| Stains | Clean spills quickly and avoid using harsh chemicals. |
| Odors | Use lemon or baking soda to remove smells after cleaning. |
Frequently Asked Questions
How Do I Choose The Right Finish For My Cutting Board?
When selecting a finish, prioritize food-safe options like mineral oil or beeswax. These finishes protect the wood and enhance its natural beauty. Avoid finishes that contain harmful chemicals. Consider how often you’ll use the board, as some finishes require more frequent maintenance.
Can I Use Olive Oil On My Cutting Board?
It’s best to avoid olive oil for finishing. While it’s food-safe, olive oil can become rancid over time. This may cause unpleasant odors and affect the board’s longevity. Instead, opt for mineral oil or specialized cutting board oils for lasting protection.
How Often Should I Refinish My Cutting Board?
Refinish your cutting board every few months or as needed. Regular maintenance depends on usage frequency. Signs you need to refinish include dryness, roughness, or dull appearance. Consistent care extends your board’s life and maintains its hygiene and appearance.
What Is The Best Way To Apply Finish?
Apply finish using a clean, lint-free cloth. Rub the oil or wax in the direction of the wood grain. Allow it to soak in for several hours. Wipe away any excess and let the board dry completely before use.
Conclusion
Finishing your cutting board well keeps it strong and safe to use. Use oil or wax to protect the wood from water and stains. Sand the surface smoothly for a nice, even feel. Take your time and follow steps carefully.
A good finish helps your cutting board last longer. Enjoy your work every time you cook or prepare food. Small effort makes a big difference in quality and beauty. Keep your board clean and oiled regularly. It will stay fresh and useful for years.
Simple care brings great results.