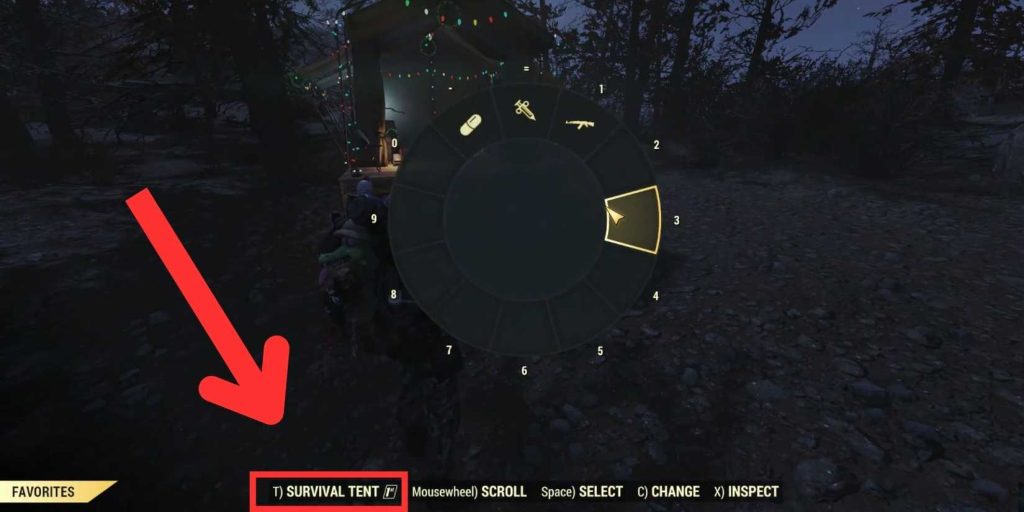
Setting up your tent quickly and correctly can make all the difference between a smooth camping experience and a frustrating one. If you’ve ever struggled with laying down your tent in a tight space like 76, you’re not alone.
But don’t worry—this guide will walk you through every simple step you need to follow. By the end, you’ll feel confident and ready to tackle your next outdoor adventure with ease. Keep reading, and discover how to lay down your tent in 76 without the hassle.
Choosing The Right Spot
Choosing the right spot for your tent is very important for a good camping experience. The right place keeps you safe and comfortable during your stay.
Look carefully at the area before you set up your tent. This helps you avoid problems like bad weather or rough ground.
Check The Ground Surface
Make sure the ground is flat and firm. Soft or rocky ground can make it hard to sleep and can damage your tent.
- Clear away rocks, sticks, and sharp objects
- Avoid low spots that can collect water if it rains
- Choose dry and level soil for better comfort
Consider Wind Direction
Check the wind direction to protect your tent from strong gusts. Facing the narrow side of the tent into the wind reduces pressure on the fabric.
| Wind Direction | How to Position Tent |
| From the North | Place tent door facing East or West |
| From the East | Place tent side facing East |
| From the South | Place tent door facing West |
| From the West | Place tent side facing West |
Look For Natural Shade
Natural shade helps keep your tent cool during hot days. Trees or large rocks can block sunlight and protect you from heat.
Choose a spot near:
- Tall trees with wide branches
- Rock formations that block direct sun
- Areas with bushes or shrubs for extra cover
Preparing The Site
Setting up your tent properly starts with preparing the site. A well-prepared site ensures comfort and stability for your tent.
Follow these steps to make sure your campsite is ready for your tent. Clear the area, level the ground, and mark where your tent will go.
Clear Debris And Rocks
Remove debris and rocks to create a smooth surface for your tent.
- Pick up all sticks and twigs from the ground.
- Move away any rocks and pebbles.
- Check for sharp objects like glass or nails.
Level The Ground
Ensure the ground is flat to keep your tent stable. A level surface improves comfort when sleeping.
Mark Tent Corners
Marking tent corners helps you set up your tent accurately. It ensures your tent fits the space properly.
| Action | Tool Needed |
| Place markers at each tent corner | Rocks or sticks |
| Check alignment with a rope | Rope |
Unpacking And Sorting Tent Parts
Setting up a tent starts with unpacking all parts carefully. Sorting these parts helps you set up faster and avoid mistakes.
Take your time to check each component before you begin laying down the tent. This simple step saves trouble later.
Lay Out Tent Components
First, empty the tent bag and spread everything on a clean surface. Lay out the tent fabric, rainfly, poles, stakes, and any accessories.
Organize the parts by type and size. This makes finding items easier as you build your tent.
Identify Poles And Stakes
Tent poles come in different lengths and colors to match their place in the setup. Stakes also vary by size and shape for ground conditions.
- Match poles by color or number markings.
- Group stakes by length and type.
- Separate any extra or spare parts.
- Keep all clips and connectors close to poles.
Check For Damage
| Part | What to Check | Action if Damaged |
| Tent Fabric | Holes, tears, or mold | Patch holes or clean fabric |
| Poles | Bends, cracks, or broken sections | Replace or repair poles |
| Stakes | Bent or rusted metal | Straighten or swap stakes |
| Rainfly | Rips or missing grommets | Patch or fix grommets |
Check every part carefully before setup. Fixing damage early avoids bigger problems while camping.

Credit: www.reddit.com
Setting Up The Tent Base
Setting up the base of your tent is an important first step. It makes your camping experience more comfortable and safe.
A strong base protects your tent floor and keeps it dry. Follow these tips to create a good foundation.
Spread The Tent Footprint
Start by laying out the tent footprint on flat ground. The footprint is a protective layer that goes under the tent.
Make sure the footprint covers the whole tent floor. This stops sharp stones and dirt from damaging it.
Align With Wind And Sun
Place your tent so the door faces away from the wind. This helps keep the inside warm and dry.
Try to position the tent where the sun will shine on it in the morning. This warms the tent and dries dew quickly.
- Door faces opposite the wind direction
- Morning sun hits the tent front
- Avoid low spots where water can collect
Secure The Corners
Once your footprint is in place, secure the corners with stakes or pegs. This stops it from moving in the wind.
Pull the footprint tight but not too tight. Loose corners can cause wrinkles that let water pool under the tent.
- Use strong stakes for each corner
- Push stakes at a 45-degree angle away from the tent
- Check tension to keep the footprint flat
Assembling Tent Poles
Setting up your tent starts with assembling the poles. This process gives the tent its shape and strength. Follow these simple steps to connect and secure the poles properly.
Take your time to avoid breaking or bending the poles. Correct assembly ensures your tent stays stable during use.
Connect Pole Sections
Most tent poles come in sections held together by an elastic cord. Lay out all pole pieces on the ground. Match each section end to its connector.
- Hold two pole sections near their ends.
- Slide the ends together until you hear a click or feel resistance.
- Repeat until all sections form one long pole.
- Check for any loose connections and press again if needed.
Insert Poles Into Tent Sleeves
After connecting the poles, slide them through the tent’s fabric sleeves. These sleeves guide the poles and shape the tent.
| Tip | Reason |
|---|---|
| Start at one end of the tent | Keeps poles aligned with sleeves |
| Gently push poles through sleeves | Prevents fabric tears |
| Do not force poles | Allows smooth sliding and avoids damage |
Attach Poles To Clips
Many tents have clips on the body that hold poles tightly. Attaching poles to clips keeps the tent stable and upright.
- Locate the clips along the tent walls.
- Snap each clip over the pole at regular intervals.
- Ensure clips are fastened securely but not too tight.
- Adjust clips if the tent fabric feels too loose or tight.
Raising The Tent
Raising a tent is a key part of camping setup. It takes care and attention to do it right.
This guide covers how to lift the tent frame, adjust poles, and make sure the tent stands firm.
Lift Tent Frame Carefully
Pick up the tent frame with steady hands. Avoid sudden moves to keep it safe and balanced.
Ask for help if the frame is heavy or large. Two people make lifting easier and safer.
Adjust Pole Positions
After lifting, check each pole’s position. Poles must fit well into their sockets or sleeves.
- Make sure poles are straight and not bent.
- Push poles firmly into connectors.
- Align poles with tent fabric loops or hooks.
- Adjust pole angles to match tent shape.
Ensure Tent Stands Firm
Secure the tent to the ground to keep it steady. Use stakes and guy lines if available.
| Item | Purpose | Tip |
| Stakes | Hold tent base down | Drive stakes at a 45-degree angle |
| Guy Lines | Add extra support | Tighten lines evenly on all sides |
| Poles | Support tent structure | Check for damage before use |
Securing The Tent
Securing your tent is important to keep it safe from wind and rain. It helps the tent stay stable during your camping trip.
Follow simple steps to make sure your tent is firmly in place. This will make your camping experience more comfortable.
Drive Stakes Into Ground
Stakes hold your tent to the ground and stop it from moving. Use a hammer or rock to push the stakes firmly into the soil.
Place stakes at a 45-degree angle away from the tent. This angle gives the best hold and keeps stakes from pulling out.
- Use strong stakes for hard or rocky soil
- Check that stakes are deep enough for good grip
- Space stakes evenly around the tent base
Tighten Guy Lines
Guy lines help keep the tent stable in wind. Tie lines to the tent loops and pull them tight.
Attach the other end of each line to a stake. Make sure the lines are tight but not too tight to avoid damage.
- Check each guy line for slack
- Adjust lines if the tent moves in the wind
- Use tensioners if available for easy tightening
Check Tent Tension
Tension keeps the tent fabric smooth and dry. A tight tent will stop water from pooling on the roof.
Walk around the tent and press gently on the fabric. Adjust stakes and guy lines to remove any sagging.
- Look for loose areas where rain can collect
- Tighten stakes or guy lines as needed
- Keep the tent shape firm but avoid overstretching
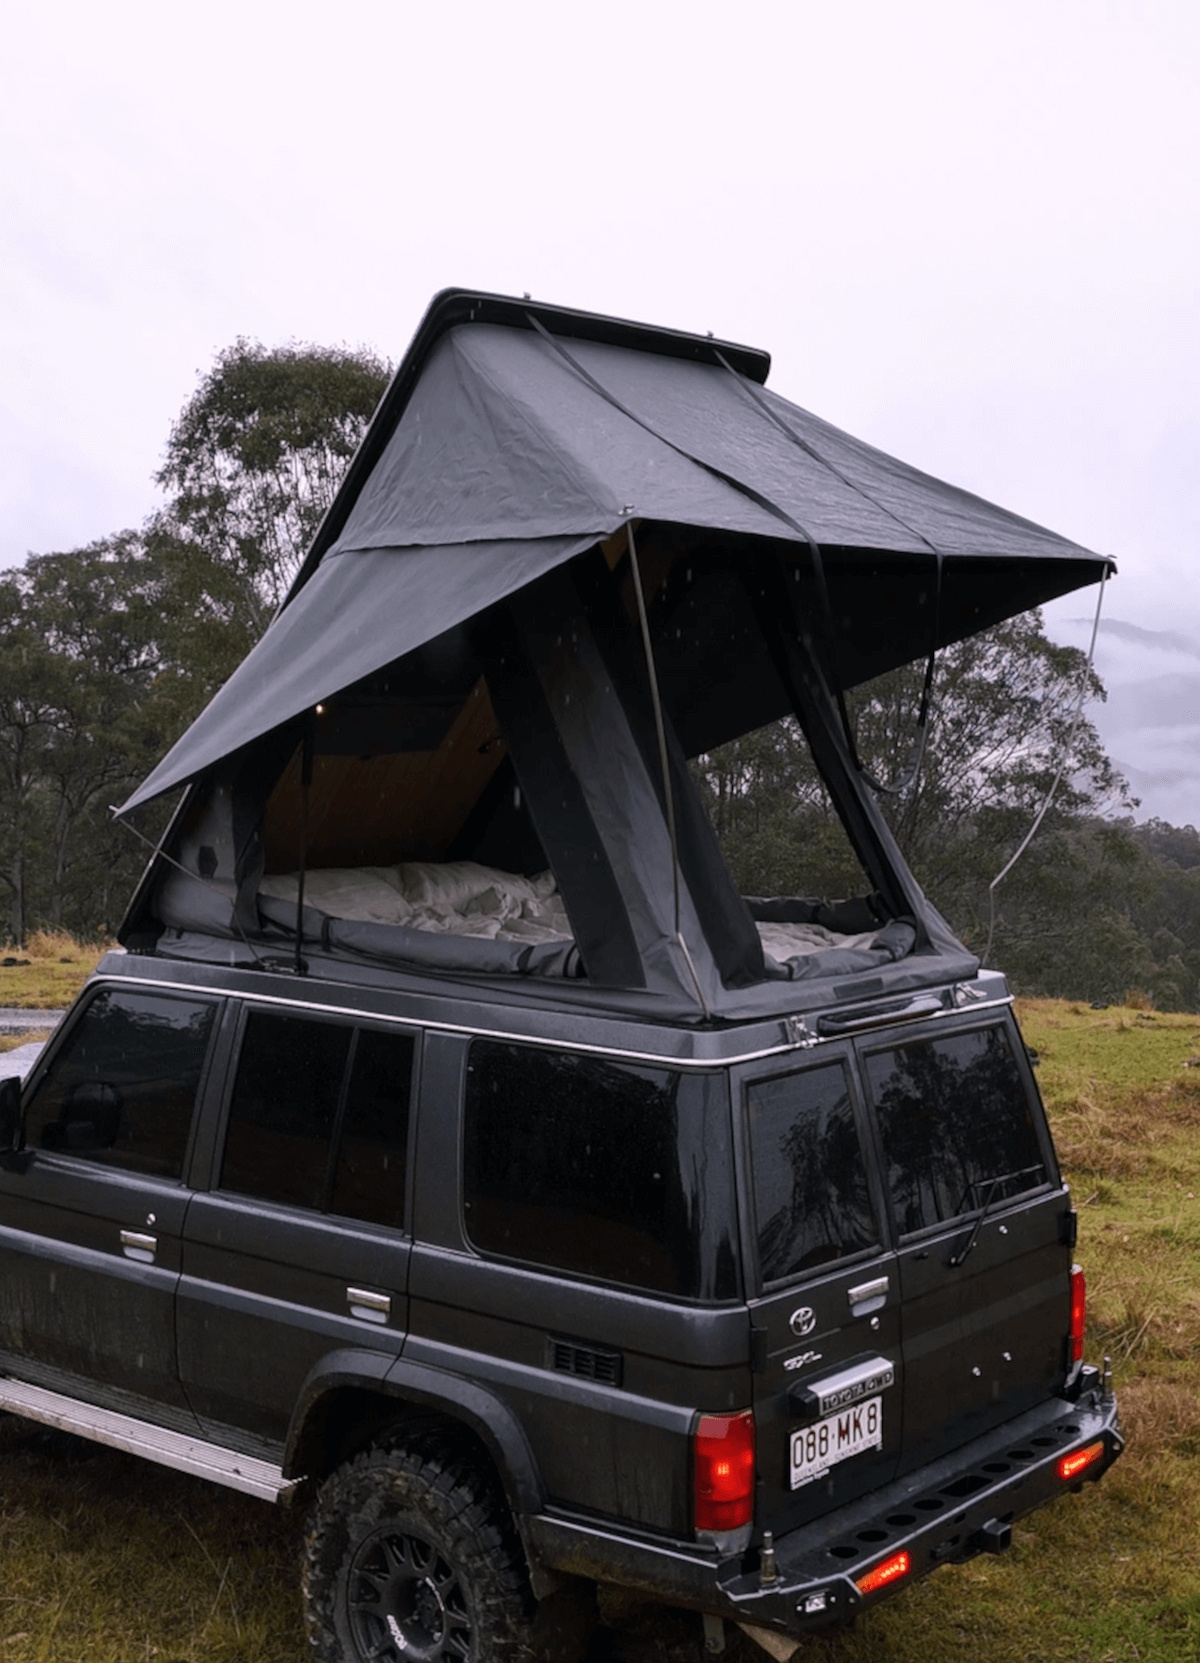
Credit: headspacecampers.com
Adding Rainfly And Ventilation
Adding a rainfly to your tent helps protect you from rain and wind. Proper ventilation keeps the air fresh inside your tent. These steps make your camping experience more comfortable and dry.
Follow simple actions to place the rainfly correctly, attach the hooks, and open vents for good airflow. Each part plays a key role in shelter and comfort.
Position Rainfly Correctly
Place the rainfly over the tent so it covers all sides. Make sure it extends beyond the tent edges. This stops rainwater from leaking inside. Align the rainfly so doors and windows match the tent openings.
- Spread rainfly evenly over tent
- Check that doors and windows align
- Allow rainfly edges to reach ground
- Tighten straps to avoid sagging
Attach Rainfly Hooks
Secure the rainfly by hooking it to the tent frame. This keeps it from blowing away in the wind. Attach hooks to the loops or rings on the tent body. Check that all hooks are fastened tight.
| Hook Type | Location | Purpose |
| Clip Hook | Top corners | Hold rainfly to tent poles |
| Loop Hook | Side edges | Secure rainfly to tent rings |
| Elastic Hook | Bottom straps | Keep rainfly tight and stable |
Open Vents For Airflow
Open the vents on the rainfly and tent for fresh air. Good airflow reduces heat and moisture inside. This helps stop condensation and keeps your tent dry.
- Locate vents on rainfly and tent sides
- Use zippers or Velcro to open vents fully
- Adjust vent openings based on weather
- Ensure no rain or bugs enter through vents
Final Checks And Tips
After setting up your tent, take time to do final checks. These checks ensure your tent stays safe and comfortable. Following simple tips helps you enjoy your camping experience more.
Below are important areas to focus on before you settle in. Each step helps keep your tent stable, organized, and well-maintained.
Inspect Tent Stability
Check all tent poles and stakes to make sure they are secure. Loose parts can cause the tent to collapse in wind or rain.
- Push stakes firmly into the ground at an angle.
- Tighten all guy lines evenly around the tent.
- Ensure poles fit tightly in their sleeves or clips.
- Look for any damage or tears in the fabric.
- Test the tent’s firmness by gently pushing on the walls.
Organize Interior Space
Keep the inside of your tent tidy for comfort and safety. Proper organization helps you find items fast and prevents damage to your gear.
| Tip | Reason |
|---|---|
| Store shoes in a corner | Keeps dirt out of sleeping area |
| Use small bags for toiletries | Prevents spills and clutter |
| Hang lanterns or lights | Frees floor space and improves visibility |
| Keep food outside the tent | Avoids attracting insects and animals |
Maintain Tent Throughout Use
Look after your tent during your stay to keep it in good shape. Small actions prevent bigger problems later.
- Remove dirt and leaves daily.
- Keep zippers clean and free of sand.
- Air out the tent to avoid moisture build-up.
- Fix small tears or loose seams right away.
- Store the tent dry before packing it away.

Credit: www.lifeintents.com
Frequently Asked Questions
How Do I Choose The Right Spot To Lay A Tent In 76?
Pick a flat, dry area free of rocks and debris. Avoid low spots prone to flooding. Look for natural windbreaks like trees or bushes for shelter.
What Essential Tools Do I Need For Tent Setup In 76?
Bring tent stakes, a mallet, and a ground tarp. Use a stake puller for easy removal. Carry a repair kit for emergencies.
How Can I Secure My Tent Against Strong Winds In 76?
Anchor all tent corners firmly with stakes. Use guy lines tightened properly. Position the tent’s narrow end into the wind for stability.
What Is The Best Way To Lay Out The Tent Floor In 76?
Spread a ground tarp larger than the tent base. Place the tent on top to prevent moisture damage. Ensure the tarp edges don’t extend beyond the tent.
Conclusion
Laying down a tent in 76 is easier than it seems. Follow each step slowly and carefully. Choose a flat spot free of rocks and sticks. Unfold the tent and spread it out. Secure the corners tightly to keep it stable.
Check the tent poles fit correctly and stand firm. Practice makes the process quicker and smoother. Enjoy your camping time with a well-set tent. Stay safe and have fun outdoors.