Have you ever noticed a damaged eyelet on your fishing rod and wondered how to fix it yourself? A broken or worn-out eyelet can ruin your fishing experience, causing line tangles or even breaks at the worst moments.
But don’t worry—you don’t have to buy a new rod or pay for expensive repairs. You’ll discover simple, step-by-step instructions to replace the eyelet on your fishing rod quickly and easily. Keep reading, and you’ll be back to fishing with confidence in no time.

Credit: www.reddit.com
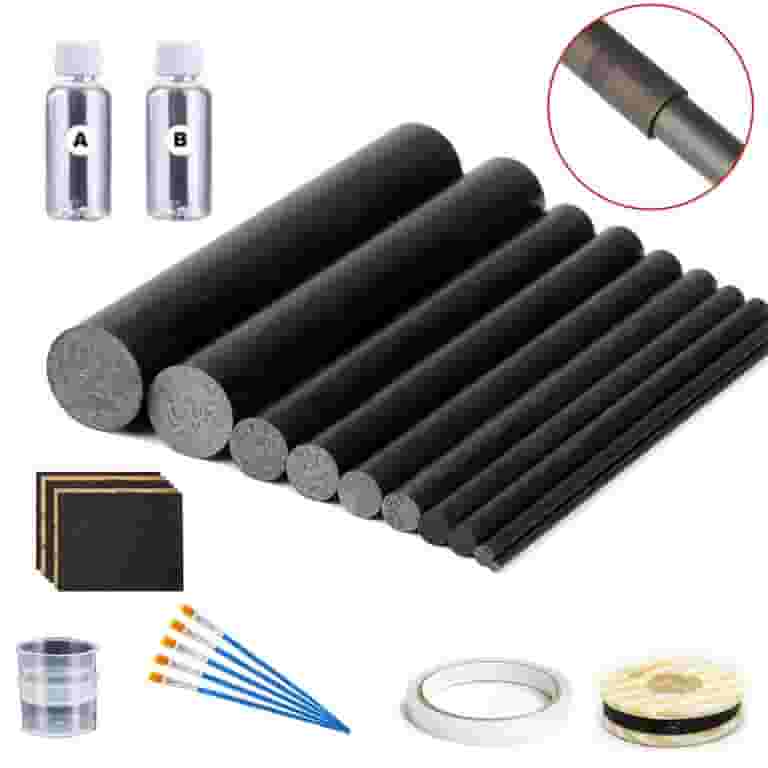
Tools And Materials Needed
Replacing an eyelet on a fishing rod needs some basic tools and materials. Having the right items helps you do the job well.
Here is a list of what you need to replace a fishing rod eyelet safely and correctly.
Replacement Eyelets
Choose an eyelet that fits your fishing rod size and type. Make sure it matches the rod’s guides for smooth line flow.
Eyelets come in different materials like stainless steel or ceramic. Pick one that suits your fishing style.
Thread Or Wrapping Material
Use strong thread to wrap the new eyelet onto the rod. Nylon or polyester thread works well for durability.
- Choose thread color that matches the rod
- Use fine but strong thread for tight wrapping
- Prepare enough length to cover the guide foot
Epoxy Or Rod Finish
Epoxy seals the thread and keeps the eyelet in place. Use clear rod finish for a neat look.
- Use slow-curing epoxy for smooth coating
- Apply thin layers to avoid lumps
- Make sure epoxy is safe for fishing rods
Cutting And Sanding Tools
You need scissors or a sharp knife to remove old thread and trim new thread. Fine sandpaper helps smooth rough spots.
- Small scissors or hobby knife for cutting thread
- Fine grit sandpaper (400 to 600 grit)
- Use sandpaper gently to avoid damage
Other Helpful Tools
Some extra tools make the job easier. Tweezers help position thread, and a small brush helps apply epoxy.
- Tweezers for precise thread handling
- Small paintbrush or disposable brush for epoxy
- Clamps or tape to hold the eyelet while drying

Credit: www.reddit.com
Removing The Old Eyelet
Replacing an old eyelet on a fishing rod needs care. You must remove the old eyelet before adding a new one.
This guide covers three key steps to remove the old eyelet safely and cleanly.
Cutting The Thread Wrap
First, use a sharp blade or scissors to cut the thread wrapping around the eyelet. Be careful not to damage the rod blank underneath.
- Find the thread wrap holding the eyelet in place.
- Carefully slice through the thread without cutting the rod.
- Remove the loose thread pieces from around the eyelet.
Heating The Eyelet
Heating softens the glue securing the eyelet. Use a heat gun or hairdryer for this step.
- Turn on your heat source to medium heat.
- Hold it near the eyelet for about 30 seconds.
- Check if the glue feels softer by gently pressing the eyelet.
- Repeat heating if the glue is still hard.
Gently Pulling Off The Eyelet
After heating, carefully remove the eyelet. Use smooth, gentle force to avoid rod damage.
| Tool | Purpose |
|---|---|
| Pliers with soft grips | Hold and pull the eyelet gently |
| Heat source | Loosen glue before pulling |
| Cloth or tape | Protect rod surface while pulling |
Preparing The Rod For The New Eyelet
Replacing an eyelet on a fishing rod is an important task. Before you start, ensure the rod is ready for the new eyelet. Proper preparation makes the process smooth and effective.
Cleaning The Rod Surface
A clean surface is essential for the new eyelet to adhere well. Remove any dirt, grime, or old adhesive from the rod.
- Use a soft cloth to wipe the rod gently.
- Apply a mild cleaning solution if needed.
- Ensure the rod is completely dry before proceeding.
Sanding And Smoothing
Sanding the rod surface ensures it is smooth and ready for the new eyelet. This step is crucial for a perfect fit.
Use fine-grit sandpaper for the best results. Sand lightly to avoid damaging the rod. After sanding, wipe the area with a clean cloth to remove dust.
Attaching The New Eyelet
Replacing the eyelet on your fishing rod requires careful attachment. This ensures the eyelet holds firmly during fishing. Follow these steps to attach the new eyelet correctly.
Proper placement and secure wrapping keep the eyelet stable. Adding a protective coating extends its life. Let’s look at each part in detail.
Positioning The Eyelet
Place the new eyelet exactly where the old one was removed. Align it so the fishing line flows smoothly through it. Make sure it sits flat against the rod.
Wrapping The Thread Securely
Use strong thread to wrap the eyelet base tightly to the rod. Secure wrapping prevents movement and damage. Keep the wraps neat and close together.
- Start wrapping a few millimeters below the eyelet foot.
- Wrap upward, covering the entire foot evenly.
- Keep the thread tight but do not snap it.
- Tie off the thread securely when done.
Applying Epoxy Coating
Epoxy coating protects the thread and eyelet from wear and water damage. Use a small brush to apply it evenly over the wrapped thread.
| Epoxy Type | Drying Time | Best Use |
|---|---|---|
| Fast Cure | 2-4 hours | Quick repairs |
| Slow Cure | 12-24 hours | Stronger finish |
| UV Resistant | Varies | Outdoor fishing rods |
Curing And Finishing Touches
After replacing an eyelet on a fishing rod, curing and finishing the repair is very important. This step makes sure the eyelet stays secure and the rod works well.
Proper curing and careful inspection help the rod last longer. Testing the rod ensures it is ready for fishing again.
Allowing Epoxy To Dry
Let the epoxy dry fully before moving the rod. This may take 24 hours or more, depending on the epoxy used and room temperature.
Keep the rod in a steady position to avoid disturbing the repair. Avoid touching or bending the eyelet until it hardens.
- Place the rod on a flat surface
- Keep the area clean and dust-free
- Keep the room temperature around 70°F (21°C)
- Wait at least 24 hours before handling
Inspecting The Repair
Look closely at the new eyelet and epoxy. Check for any gaps, cracks, or loose spots around the eyelet.
Make sure the eyelet is straight and aligned with the other guides. A crooked eyelet can affect line flow and casting.
- Check for smooth epoxy finish
- Ensure no epoxy got inside the rod guides
- Confirm the eyelet is tight and secure
- Look for any glue residue to clean off
Testing The Rod
Test the rod by gently flexing it to see if the eyelet holds. Use slow, even pressure to avoid damage.
Run your fishing line through the new eyelet. Check if the line moves smoothly without catching or rubbing.
- Flex the rod slowly to test strength
- Pull line through all guides, including new eyelet
- Listen for any unusual sounds like cracking
- Check if the eyelet stays in place during testing
Tips For Maintaining Fishing Rod Eyelets
Fishing rod eyelets help guide the fishing line. Keeping them in good shape improves your fishing experience.
Regular care can stop eyelets from breaking or rusting. This guide gives simple tips for eyelet care.
Regular Cleaning
Clean eyelets often to remove dirt and salt. Use fresh water after each fishing trip.
Wipe the eyelets with a soft cloth. Avoid using hard brushes that might scratch the surface.
- Rinse eyelets with fresh water
- Use a soft cloth to dry
- Check for rust or buildup
- Clean after every use, especially in saltwater
Avoiding Damage
Handle your fishing rod carefully to protect the eyelets. Dropping or banging the rod can bend or break them.
Store the rod in a safe place. Use rod covers or cases to shield eyelets from scratches and pressure.
- Do not drop the rod
- Use rod covers for storage
- Keep away from sharp objects
- Avoid bending the rod too much
When To Replace Eyelets
Replace eyelets if they are cracked, bent, or rusted. Damaged eyelets can cut or fray fishing lines.
Check eyelets regularly. Change them before they cause problems during fishing.
- Eyelets with cracks or breaks
- Bent or misshaped eyelets
- Rust or corrosion on eyelets
- Eyelets causing line damage

Credit: chimiya.com
Frequently Asked Questions
How Do I Remove An Old Eyelet From A Fishing Rod?
To remove an old eyelet, gently heat the glue area with a heat gun. Use pliers to carefully twist and pull off the eyelet. Avoid damaging the rod blank during removal for a smooth replacement process.
What Tools Are Needed To Replace A Fishing Rod Eyelet?
You need pliers, a heat gun, thread wrap, epoxy glue, and a new eyelet. These tools help you safely remove and install the eyelet. Proper tools ensure a secure and durable eyelet replacement.
How Do I Align The New Eyelet Correctly?
Align the new eyelet with the rod’s guides and reel seat. Ensure it’s straight and matches the original eyelet’s position. Proper alignment prevents line tangling and improves casting accuracy.
Can I Replace Eyelets On Any Fishing Rod Type?
Yes, you can replace eyelets on most fishing rods, including spinning and casting rods. However, delicate or high-end rods may require professional repair to avoid damage.
Conclusion
Replacing an eyelet on your fishing rod can save time and money. Follow each step carefully to avoid damage. Use the right tools for a smooth process. Check the rod and eyelet for a proper fit. Take your time and work patiently.
Soon, your rod will be ready for fishing again. Small repairs keep your gear working longer. Enjoy your fishing trips with a well-maintained rod. Simple fixes make a big difference. Try it yourself and feel proud of the result.